The aurora borealis, or the Northern Lights as they are more commonly known, are one of the most unique and breathtaking sights on Earth. In old Norse mythology, the Vikings believed that the auroras were Valkyries – spirits who would carry the glorious dead to Valhalla after battle.
Today, we understand that they’re actually caused by trillions of electrons colliding with the Earth’s upper atmosphere – between 80 and 500 km above the surface. Spirit or science, they can be challenging to capture photographically.
Below are some tips that I had to learn the hard way, and that I hope will help if you choose to chase the majestic northern lights!
1. Location, location, location!
If you take nothing else away from this article, remember that nothing can compensate for bad weather or poor solar activity. You need two things to even see the northern lights, let alone photograph them: clear, dark skies and high solar activity.
Finding clear, dark skies when shooting the northern lights
The first can easily be determined on your favorite weather site (personally, I prefer Weather Underground because they source from thousands of local stations and have very granular forecasts).
Timing high solar activity
The second is a little different, because you’re looking for scientific data that reflects how strongly solar particles will be interacting with the Earth’s atmosphere on a given night. I use the University of Alaska Fairbanks’ Geophysical Institute.
They use a simple 1-9 rating scale, and in my experience anything above a 3 is going to give you a great show.
While the Northern Lights have been seen as far south as Missouri, Germany, and Afghanistan, those are extremely rare cases. The three BEST locations in the world are
Tromsø (Norway),
Reykjavik (Iceland),
and Fairbanks (Alaska).
I have personally photographed in the first two and am particularly fond of Tromsø. If you’re still saving for a plane ticket, check out the next tips so you can hit the ground running.
2. Pack your tripod
A tripod is absolutely critical when capturing the lights. Because of the extended exposure times required, there is NO WAY you will be able to salvage a usable handheld shot.
Because you might be shooting in snow, or sand, or even in the water, you’ll want one with sufficient height, and because you might often be shooting in heavy Arctic winds, a ballast hook is also a nice feature to have.
A ballast hook enables you to hang a heavy weight on the underside of your tripod to help ‘anchor’ it into place so it doesn’t move or shift with winds.
A final word of warning: if you don’t normally shoot with a tripod, PRACTICE. Make sure that your chosen tripod can support the weight of the camera and lens you plan to use.
True story: I saw a Canon 5D III face-plant some frozen snow because its owner had more money than brains and used a flimsy loaner tripod.
3. Use a fast lens
By “fast,” I’m referring to aperture. The smaller your aperture number, the bigger the hole in the front of your camera, and the more light that can enter.
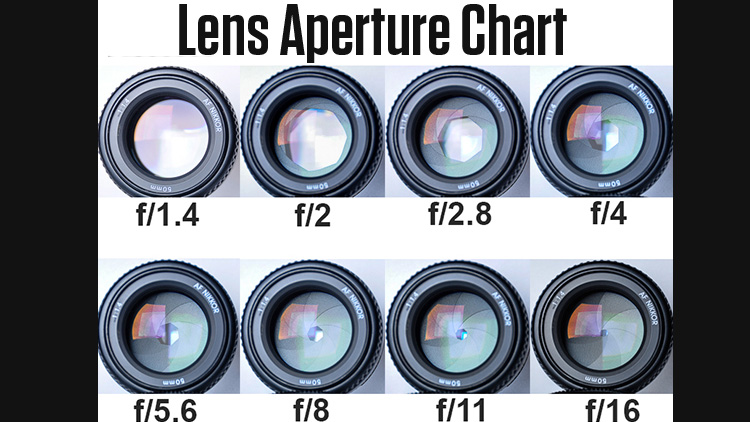
If you could benefit from a refresher course on aperture, ISO, shutter speed, composition, and other building blocks of photography I highly recommend Mike’s excellent Hacking Photography Ebook Collection.
[Mike Newton here: get the ebook set here at 37% off for being a blog reader :) ]I’d suggest a maximum of f/4, but ideally 2.8 or below. This is more about stacking the odds in your favor than anything else — sometimes a weak auroral display can still yield good images if you’ve got a fast enough lens.
4. Choose your ISO appropriately
This has the potential to really screw up a shot. Especially with digital sensors, electrical noise from a higher-than-necessary ISO will render your shot unusable.
For the northern lights, resist the urge to crank it as high as it will go. Remember, the goal is not to brighten the night sky (a fool’s errand) but to capture the lights cleanly and crisply.
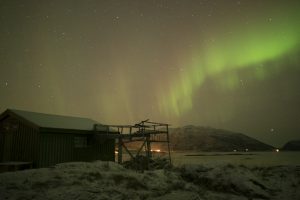 [As you can see in this image, the northern lights are really weak to begin with, and I tried to compensate with a higher ISO. All it does is make the sky look unnatural. The correct move here would have been to use a longer exposure.]
I won’t recommend a specific range, because lots of cameras (for example the Sony A7SII) simply perform better than others in low light and there is no magic number.
Instead, my rule of thumb is: if you wouldn’t go above a certain ISO in daylight due to noise, don’t to it at night either. It’s a lot easier to prevent noise by getting it right in-camera than to try and remove it in post later.
5. Calibrate your shutter speed to the lights’ brilliance
This is probably the most random, head-scratching, crapshoot variable in this list. If your exposure is too short, you’ll end up with a black frame, and if you expose too long, you’ll have amorphous green blob.
Ideally, you want to see a nice, crisp steak of color that appears to be dancing and wending its way across the night sky. To make matters worse, the auroras can vary in strength from minute to minute.
With extremely strong auroras, I’ve gotten useable images from a 2.5 second exposure. When they’re weak, something closer to 20 or even 30 seconds might be more appropriate (and remember, this also depends on your aperture – higher f/ numbers will require longer and longer exposures).
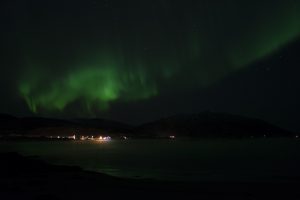
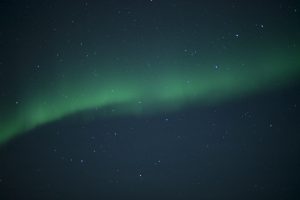 [As you can see in the image on top, the auroras are clearly defined, but the exposure was way too short to capture them and their illumination of the countryside. On the bottom, the auroras are bright enough, but the exposure was so long that they’re poorly-defined and appear as a green blob.]
There’s no real “hack” here, just a lot of trial and error. Having a remote shutter release (up next) will speed up your flow significantly.
6. Bring a remote shutter release
While this isn’t an absolute necessity, it will increase your odds of getting the shot exponentially. You can always use a self-timer if your camera has one, but this slows down your workflow and also wastes precious battery power (that’s already being sapped away by the bone-chilling cold).
Basic cable triggers are cheap and small, so there’s really no reason not to throw one in your bag before heading north. As a bonus, they can be operated through thick, warm gloves!
7. Be cognizant of your surroundings
Three words: tourists with flashlights. I bet you thought I was going to say “beauty of nature” or something like that.
While attractive earthbound scenery will be an eventual consideration for your shots, ultimately your goal is to capture the auroras in all their glory. With this in mind, be aware of any head-in-the-clouds tourists with flashlights, headlamps, or any other sources of light contaminating your frame (or worse, wandering into it!).
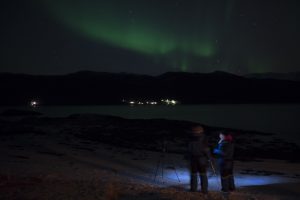
There is nothing worse than being on your 18th second of a 20-second exposure and seeing someone you didn’t even know was there turn on a flashlight!
If you’re with a group, get far away. Find your own spot that’s well away from anyone else, and remember: if you do need to move to illuminate your surroundings, give a clear verbal warning BEFORE inadvertently destroying someone else’s shot.
8. Bring a flashlight of your own
While we’re on the subject of flashlights, make sure to bring one of your own. Besides being infinitely practical when navigating high brush or rocky outcroppings, you can use them for light painting during your long exposures!
A technique I like to use is this: compose your shot of the lights, then position your subjects as if you were shooting a portrait. With them holding absolutely still, start your exposure.
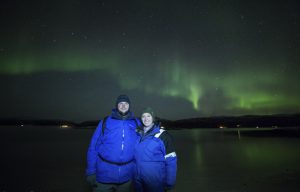
Then, during the last second, pass your light over their faces right before your shutter closes. This will result in a stunning keepsake, with both the aurora and your family/friends perfectly exposed!
[Mike again – I recently bought this $8 flashlight on Amazon and have been blown away by how much power it puts out.It telescopes which means you can zoom in/out the pattern of light as well. It only takes 3 AAA batteries to power it and it stays powered up for a long time by using LED light. Best investment I’ve made into night photos yet and only $8!]
Summing it all up
If you’re planning a trip north in the near future, just remember to take your time, dress warmly, experiment a lot with your camera, and most of all: take some time away from the shutter to actually enjoy the lights dancing above you!
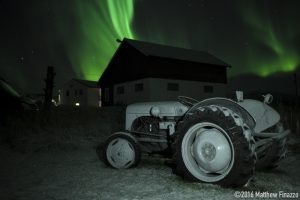
The auroras illuminate a vintage tractor on a farm in rural Norway. (Sony a6300 with Zeiss 24mm, f/1.8, 1.6 seconds, ISO 1250).


Still not had a good opportunity to photograph them despite having been to Iceland 3 times in the winter. Great article though.
Great piece. All the right points presented in a way that novice and advanced shooters can appreciate. Including shots that are NOT taken properly helps us ‘visual’ learners.
Thanks Ted! I always learn best with the shots that show me what NOT to do as well :)