My photography business Mike Newton Photography was recently hired to photograph the biggest-budget club and restaurant in my city of San Diego by the design firm Davis Ink LTD. Davis Ink is a rad company who consistently creates the most incredible spaces for restaurants and clubs in Southern California and Hawaii. Anytime the Co-Founder has a ton of tattoos, I know I’m going to get along with them great :)
They needed stand-out images of the space that took 2 years in planning, executing, and building to complete. Needless to say, on a project of this scale the images needed to be flawless.
The challenge
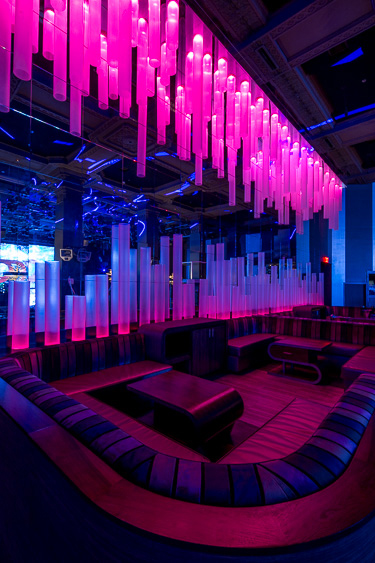
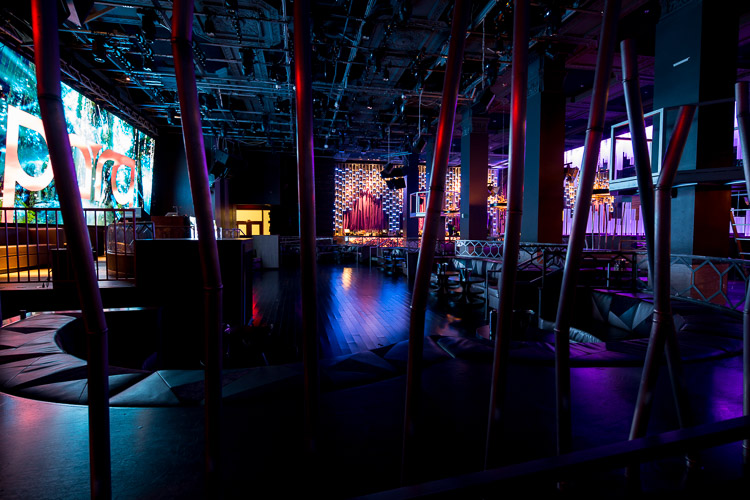
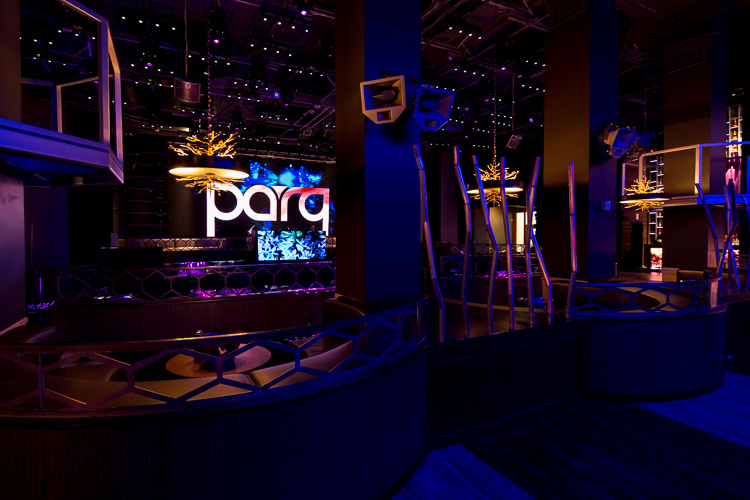
The venue in question is Parq, a combination of restaurant and club. The club portion was going to be tricky due to the lighting.
The contrast between bright highlights from one of the biggest LED screens in the US and pink tube lights, mixed with the extreme darkness of the rest of the space meant I was going to have to composite multiple images together to pull off the final image.
I called up my buddy Alex Taylor (dude has only been shooting for six months and is rediculously good) as he wanted to learn more about commercial shoots and lighting. He was really helpful in being a voice-activated-light-stand (VALS) and also being a second set of eyes to make sure I didn’t miss anything.
The images used for the shoot
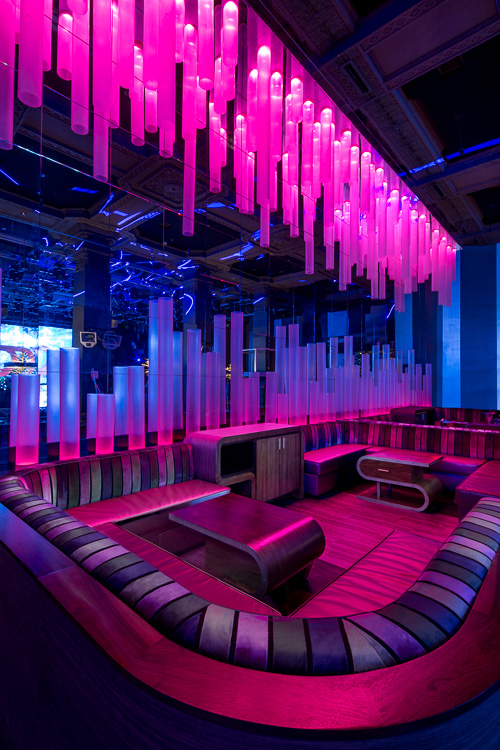
The base image
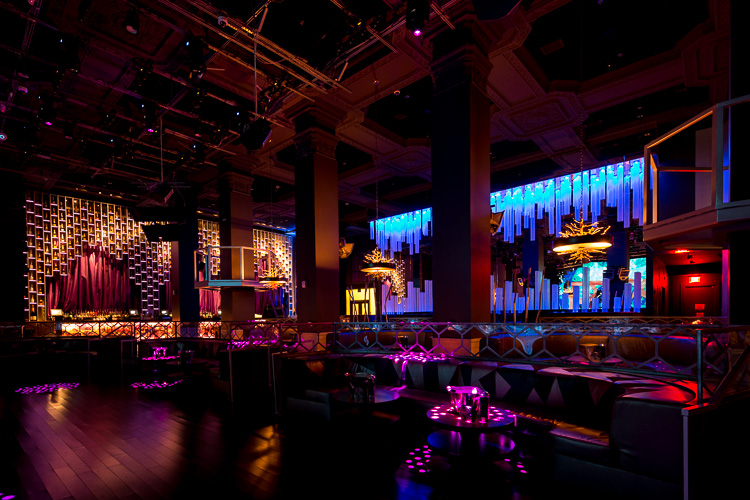
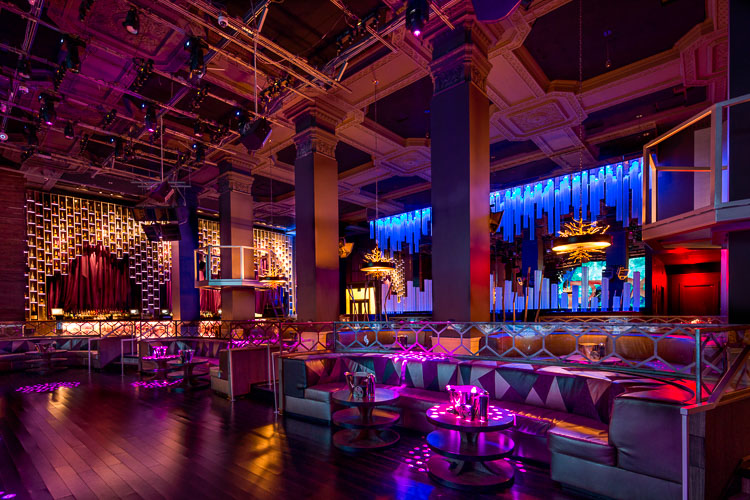
I had to shoot a base image to work from. For this I exposed for the bright LED wall and ceiling tube lights.
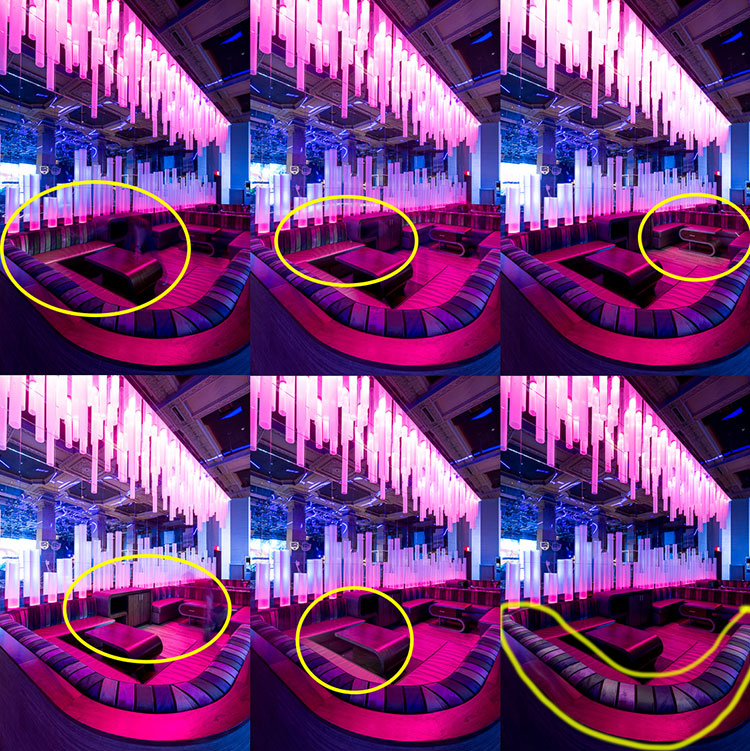
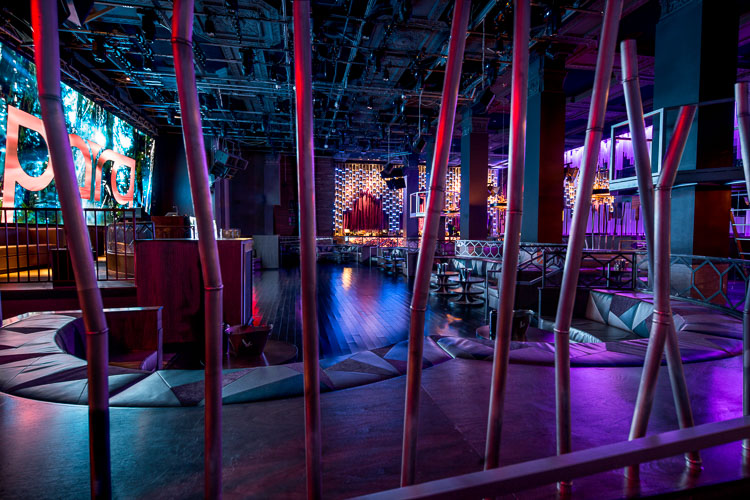
The additional light-painted images
The obvious problem with the image above is that there is no detail in the booth because there are no lights in there. I used 6 additional light-painting to bring out the details in these shadowy areas.
What took so long
Layer masks and blending them in
This image was time consuming because I had to create a layer mask for each light-painted area and blend it in smoothly. Admittedly I’m not the fastest photo editor out there but I’m also not the slowest.
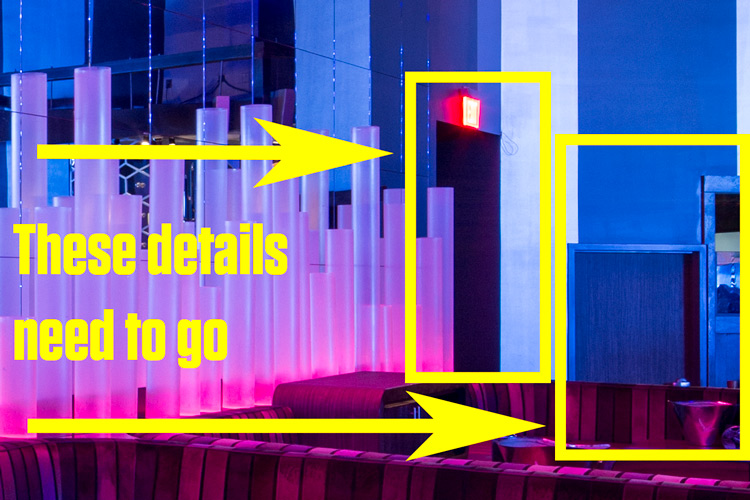
All the tiny details
The designer is meticulous in their attention to detail so there were many little items to fix in post. Removing the glare from the exit sign, removing finger marks from the fabric on the rim of the booth, cleaning up little dust pieces on the booth, removing the doors in the back, etc.
Watch the timelapse edit video below to see exactly what went into this image:
Here are a few before/after images

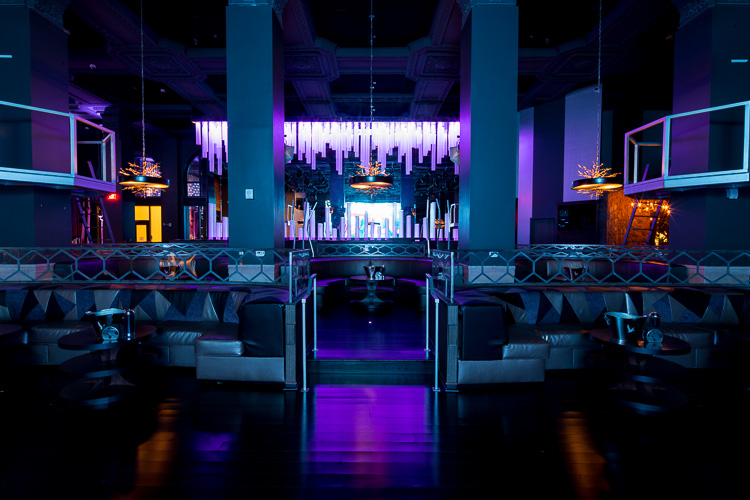
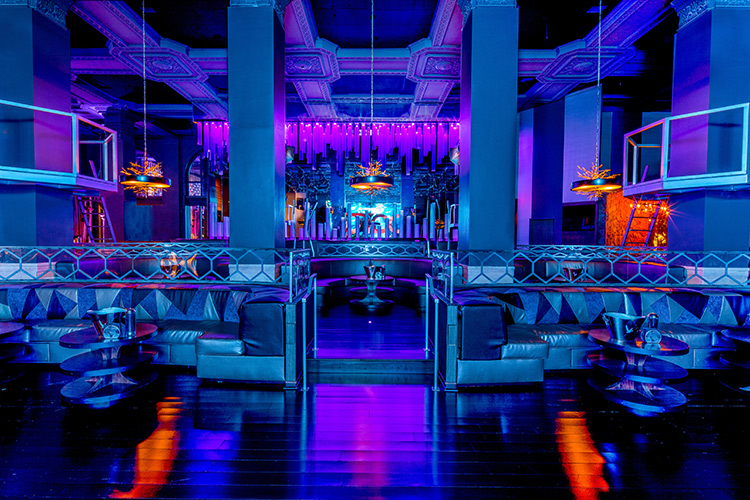


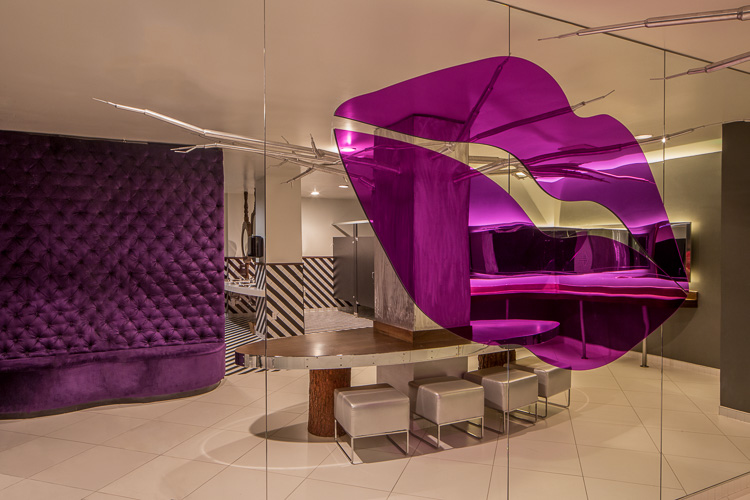
This last one was tricky because the entire wall was a mirror and there was no way to get this composition without getting my camera in the shot. Because of that, I had to edit out the camera, shadows from the tripod, and match up the lines in the tiles so it looked real – that took a long time.
Creating a great image isn’t just clicking the shutter
I wanted to write this post to show you the time that goes into a final advertising image and show my own photography clients the work and effort required to create the images I create.
Many clients have a misconception that the photo shoot ends when I stop shooting. In reality, its only just begun. Here is what goes into a shoot:
Pre-Pre-shoot
- Communicate with client on concept and shoot goals
- Work out a time for shoot
- Send contract for signature and follow up to get it back with payment prior to shoot
- Make a shoot schedule and shot list to follow on the shoot
Pre-shoot
- Organize gear based on the shoot requirements
- Clean lenses, check sensor for dust, format memory cards, charge batteries, etc.
- Load the car with gear (this took 30 minutes for 5 strobes, 5 light stands, tripod, camera, lenses, modifiers, cords/cables, laptop/tethering gear)
- Drive to venue and find parking
- Unload the car (this took 20 minutes to unload from the car to the venue
- Set up all the gear (20 minutes to set up all strobes onto light stands, attach camera to tripod, plug in lights to walls/battery packs, dial in the strobe triggers, etc)
- Get laptop ready to tether the camera to Lightroom so client can see as we are shooting.
During the shoot
- Compose each image.
- Light each image. Most of the images from this shoot required 5-7 images at varying exposures/light-painting to be composited later. Some of this is trial and error when it comes to light-painting and positioning lights. I was at this area for one hour shooting these 7 images to get them right and pre-plan how the composite would come together in the end.
- Check out images in tethered laptop with client as we shoot to make sure we are on the same page. If need be, recompose and start again if they want a few choices.
- Each new shot requires moving all the gear around the space, recomposing, and starting all over again. I was at this shoot for 8 hours to create 16 images, which was working pretty damn fast.
Post-shoot
- Pack up gear (30 minutes) – repack lights, lenses, modifiers, break down light stands, boom stands, rewrap cables, pack laptop, etc.
- Haul gear from venue to car and repack the car.
- Drive back home.
- Unpack the car and replace gear in storage.
Editing
- Plug in memory card and import photos.
- Create new folders and sub folders for image organization.
- Retitle images, enter keywords, shoot dates, locations, clients involved, copyright info, etc. in metadata.
- Upload all the RAW images to Lightroom (takes a while to upload due to file size – this timeline varies based on the number of images).
- Create ‘image collection’ in Lightroom for future organization and quick reference
- Flag/reject images to narrow down choices.
- Upload flagged images to my website in a newly created gallery for the clients approval. This can take quite a while depending on the number of images shot.
- Send client an email with the gallery link so they can make choices. Sometimes a little more time goes into making these private and creating/sending a password.
- Once I receive final choices the editing begins.
- Depending on the complexity of the image/composite, editing a single final image can take 5 minutes or it could take +2 hours.
- Once the images are edited, I upload them to a new gallery for the client.
- After I receive feedback from the client I might need to go in and make additional edits. Add more time here.
- I then need to create a new download link for the client.
- I email the client the download link for the gallery.
Summing it up
As you can see, there is far more effort than showing up and clicking the shutter a few times. Photographers charge what might seem like a large price for a small number of images because there is a lot of pre and post work that goes into the final creation of the image and running our businesses.
I absolutely loved watching the video of your editing – you speak my language, only sooo much better. It’s like relaxing to music to see someone else’s movements in editing. Thanks for sharing all of this with us and keep it coming.
Mike, I really enjoyed your article! I have a couple of questions for your:
1) What was the approximate color temperature of the L.E.D. mains and what, if any, color corrections did it require?
2) For your main exposures, how far to the right of your histogram did you push it?
Thank you for your time!
Mike,
As always, love your work. This is very impressive, and what a great place to shoot.
Thank you so much Nancy! I’m glad to hear it was helpful. I need to start making some more videos like this.
Thanks Don, the venue was incredible!
Hi Fred, thanks for writing.
Truth be told, I didn’t measure the color temperature because the light-painting light source was the flashlight on my iphone 5s! I tried to get the exposure right with strobes but it just wasn’t working. In quick improvisation I used my iphone since I didn’t bring a specific light for light painting.
As for the main exposures I shot one standard, and one +1 stop. The others were shot at correct exposure and supplemented with light-painting.
I hope this helps!
Dear Mike I have a potential client for a product photo shoot and I want to know how to charge him because I have no idea. He wants production and post production. It’s about 100 photos that he will use in catalogs, websites etc and I need them to be perfect but I also need to consider every angle before I tell him the amount I will be charging. Please help!
Best regards
The best advice I can give you is to get a free trial of a software called Blinkbid. Just enter all your parameters in the software and it will spit out an industry appropriate quote.
Its hard to give a price without knowing a ton more information (which you need to find out in order to give an appropriate quote).
How long will the shoot take to complete? What overhead will you need to include in the cost (assistants, gear rentals, studio space rentals, travel, etc.). The client should pay for everything required to create the shoot including your hourly fee or day-rate.
After that you need to price out what editing will cost. 100 photos is a ton of work and you should charge your hourly rate based on the time you think it will take to complete the edits.
Lastly, you will need to consider what a usage license will cost. This is typically based on the industry the client is in, the distribution/circulation of the magazine they are sending out. The higher the circulation, the higher the cost for the client because your images are being used more and have a higher value. You will need to price out a timeline for usage. Does the client need the images for 1 year, 2 years, 6 months, etc? The longer the timeline for usage the higher the price.
Blinkbid will help with that part. Keep in mind if this is your first commercial shoot that these images are making your client money – plain and simple. A lot of photographers get taken advantage of the first few times around because they aren’t used to charging a higher amount of money for shoots and companies know this. They might attempt to just pay a flat day-rate with everything included which isn’t cool. They might also attempt to tell you they won’t pay for a usage license and that they just want to ‘buy out’ the photos. This means you transfer the copyright to them and they can use them forever without paying you.
I’m sorry I can’t give you an exact number as its too complex without knowing all the info, but hopefully this gives you an idea. One of the best 4-part posts I’ve ever seen on how to price corporate work was written by Peter House on this Fstoppers article. I highly recommend reading the last 3 parts.
I hope this helps, thank you for writing and reading Hacking Photography Marcela! Please follow up with me and let me know how it goes, I’d love to hear about it. Good luck!
Hey Mike,
That was super interesting, though I wish you had gone into a bit more detail regarding the light painting technique.
I’ve been hired to photograph a brand new audio recording studio that was built for a huge artist at one of his properties. I was wondering if you had any links or resources that you found helpful when starting out with this type of photography. I’ve gone through a few hours of YouTube videos and I feel pretty confident I can nail it but after reading your post I figured I’d get in touch just in case you had something worth checking out.
I understand you might be busy so no worries, either way, congratulations on the gig, final shots look awesome.
Hi Rodrigo,
Thanks for writing me man! I’m always happy to help in any way I can.
The light-painting at Parq was simply pulling out an iPhone (get a real light-painting flashlight instead :) and slowly painting each area during each exposure.
I didn’t really have a ‘formula’ I followed, I simply turned on the continuous light on the iPhone and moved it around in a fashion in which I thought would properly paint each area properly.
I guess the takeway from that is to tether your shots to a computer if possible so you can really see the results on a bigger screen as you shoot them to make sure you got it right.
I was tethered to a Mac Air 15″ laptop which was enough to see when I got it right vs. wrong. You can’t go wrong with the Fstoppers architecture photography tutorial which is on the pricey side but is well worth the price as it not only shows you excellent content but best practices with that type of business.
I’m never to busy to respond, helping other photographers is the reason I started Hacking Photography in the first place! I had plenty of help from other photographers as well so its the least I can do to pay it forward my friend!
Congrats on landing the gig, it sounds like a great opportunity.