Part 1: Looking at Landscapes Differently
Training your creative eye is as simple as looking at the same composition differently. Hopefully, by the end of this piece, you will be able to see things in a different way and take that thought and go out and recreate your favorite images.
Let’s start out at Multnomah Falls in the Columbia River Gorge.
Here’s your typical shot:
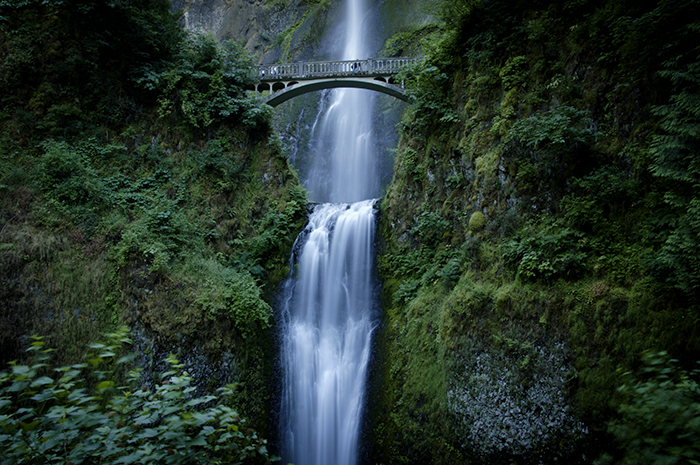
It’s the same picture that everyone takes. I have about 50 shots of this exact same composition. Another popular shot looks like this:
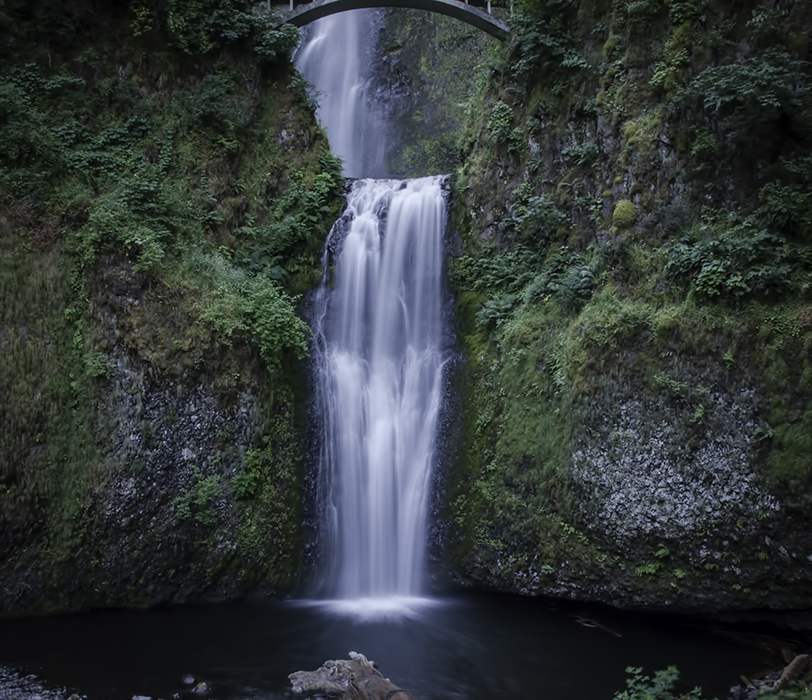
You see the above shots in books, on postcards, and waterfall directories. But what you don’t see are the creative shots – the “thinking outside the box” shots. For example, hiking up to the bridge I stopped and took this shot:
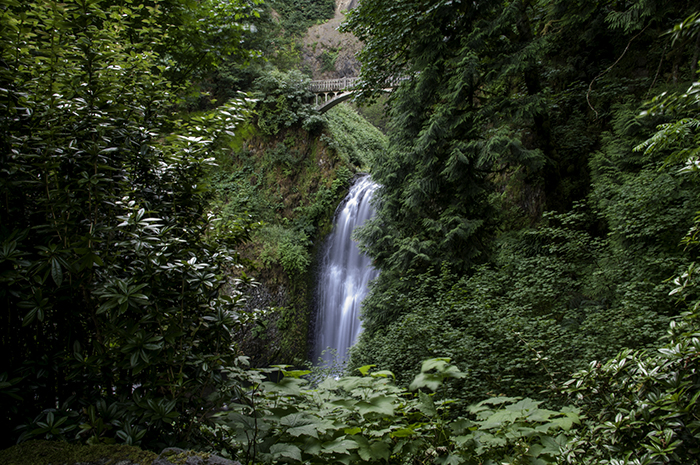
I found that the trees and shrubs framing the bottom half of the waterfall with just a peek of the bridge showing really made for a different kind of composition. You can still tell that it’s Multnomah Falls, but only if you’ve been there a million times.
This next shot I took standing on the bridge with my tripod angled down to capture this shot:
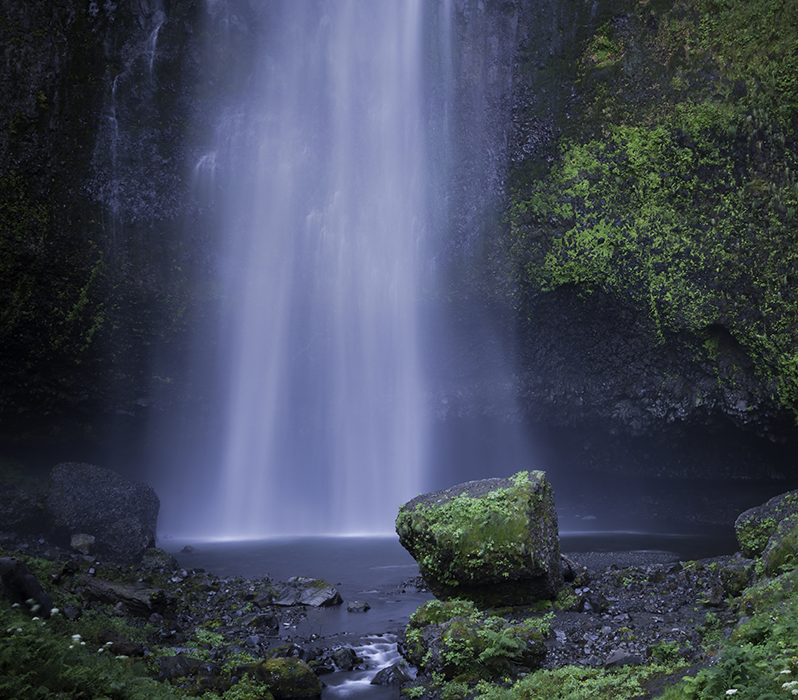
At this point, you can’t even tell it’s the popular waterfall. I managed to create something unique out of something very popular and overdone.
In creating different compositions of the same popular places, you’ve just trained your eye to look at the popular shots and turn them into something new. In post-processing, you will have a chance to add more of a unique twist to your newly composed shots.
Part 2: Post-Processing
Multinomah Falls
Here, you will have the power to add as little or as much personality to your photographs. My tastes usually run on the more “adventurous” side, depending on my intake of coffee that day :) Let’s start with this shot first:

Editing the image
Now, I will apply HP Evolution 03 “Auto Sunset” (one of my favs) from the Hacking Photography Evolution presets, HP Flare 13 “Sun Rays Top Left” preset from the Hacking Photography Sun Flare presets.
I then:
- bump up the clarity by 3,
- decrease the exposure by 5,
- bump up the contrast by 10.
Here’s the final product:
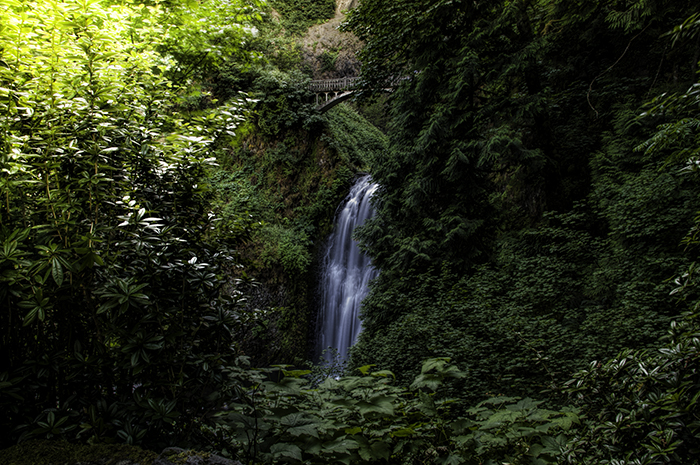
Photo summary:
As you can see, the transformation really makes the water softer and the greens pop a little more. It’s also starting to lose the popular aspects of “Multnomah Falls”. You now have something unique. Let’s process the next picture:
Cropped waterfall

Editing the image
I will apply HP Evolution Preset’s “Dark & Stormy” preset, and Sun Flare Preset’s “HP Flare 21 (vertical) Soft Light Top Right” preset.
I will then:
- bump up the clarity by 3,
- increase exposure by 5 and
- decrease contrast by 20
- I did warm up the temp a little, too.
Wallah! You get this:
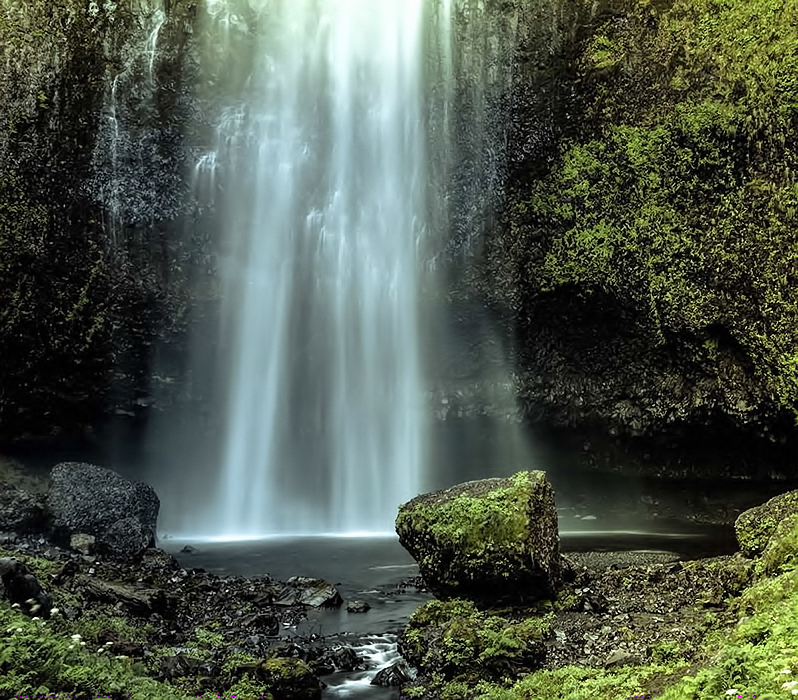
Photo summary
I can already hear the grumbling from the photog community. Yes, it’s slightly over-processed. But, it was for the purpose to show you how you can use your creative eye in post-processing.
It creates an entirely different picture. And, the best part of this shot, is you can’t even tell that this is Multnomah Falls.
Let’s continue on to something more difficult. For the next section, I will be using pictures that I just came home with.
Part 3: Creative Perspective in Post-Processing:
Ruby Beach
I recently took a trip to Ruby Beach in Washington.
It was gorgeous there. But the scenery, in my humble opinion, was not that breathtaking. There was nothing that just jumped out at me like when I’m on the Oregon coast.
So, you and I will be experimenting together as I try and turn something mundane into a work of art by mostly using my creativity in post-processing. Don’t get me wrong, you still have to have a creative eye when you take your pictures.
How to deal with drab lighting
When there is not much in the way of light; whether because it’s too bright out, not enough clouds, foggy, or just blah; you need to get creative in post-processing. Find a composition that you absolutely love and think about what you’d like it to look like after you have had a chance to process it.
Set your settings on your camera the best you can and take your shot. Here, I loved the view through the hole in the rock. I knew that I wanted to make the view pop but it was still pretty bright out, so I set up my shot (f/10, ISO 100, 1/100 sec, 18mm, 3.6) and this is what I ended up with:
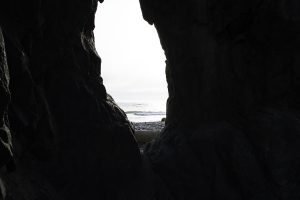
As you can see, I didn’t get much detail out of the rock and the view through the hole is totally washed out. This is where it gets fun, in my opinion.
Editing the image
I played around with several presets but ended up using the Evolution Preset’s “Bring the Drama”.
I then
- adjusted the temp to warm it up a bit and
- bumped up the contrast by 10.
Photo summary
I ended up with exactly what I was seeing through the hole; well, maybe a little better than what I had originally seen:
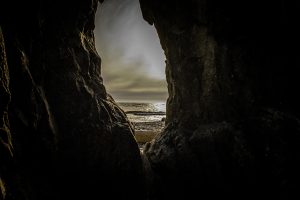
Rocky Cliffs
I set up my tripod and my camera and waited for the sun to set. It wasn’t cloudy, but it was on the hazy side. The sun was still pretty bright, so I set up my camera to tame the brightness of the sun (f/22, 1/4 sec, ISO 100, 18mm). I came away with this shot:
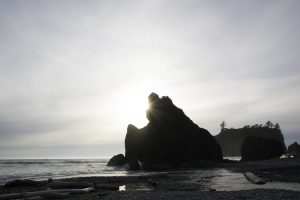
I used the driftwood as my leading line on the left side of the picture and the rock bed on the right side. Now, there’s nothing really wrong with this shot. It’s pretty, but in my opinion it needs a little oomph.
Editing the image
I applied the Evolution Presets “Beach Life” preset. I then
- dropped the exposure by 2.3
- evened out the black to “0”
- I also bumped up the contrast by 20 and
- boosted the clarity.
Photo summary
I now have a picture that isn’t as mundane as the original.
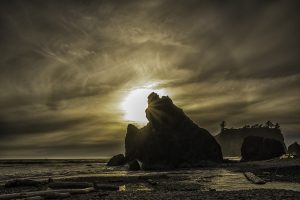
Again, some of you may think that this is totally over-processed (I can still hear the grumbling), but it adds drama and more color to what was originally just a washed out sky and background.
Rocky Shores
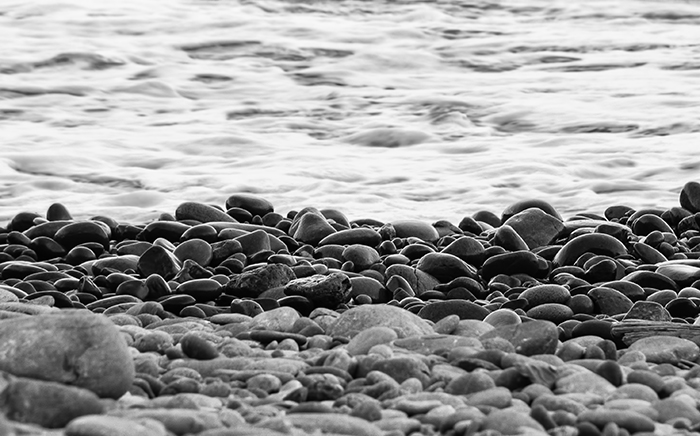
When you don’t have much in the way of a sunset (or sunrise), look around and you’ll find plenty of other options to take pictures of; like lots of wet rocks. Wet rocks make the best black and white pictures, in my opinion. I started with the below picture.
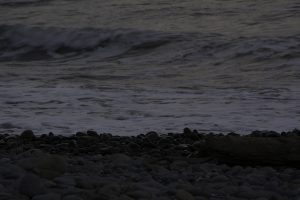
Editing the image
After bumping up the exposure to see what I had, I cropped the picture in tight so that the wet rocks in the middle of the picture would be the focal point (thought it looked cool).
I then added Evolution Preset’s “B&W Statute” to the picture to convert it to black and white. I adjusted a little bit more on the exposure and the contrast and now you have a moody picture of these wet rocks.
Cape Disappointment (the strangest name ever)
Last example, I promise! This picture was taken at Cape Disappointment. It’s a picture of the Cape Disappointment Lighthouse from Waikiki Beach (no, not the one in Hawaii).
As you can see from the original picture, the lighting was just “blah” that day, but as we’ve covered here on the blog before: some of the best images can be shot in the worst weather.
I knew instantly that this was going to be transformed into a black and white picture. I just needed to figure out my composition.
I zoomed into 75mm so that I had the cliffs off to the left and the lighthouse centered almost in the middle. Off to the right were a flock of birds flying. The lighthouse is still the focal point of my shot, however.
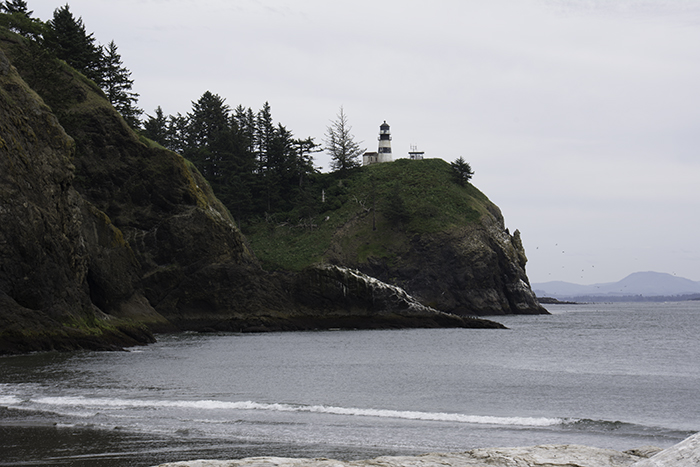
Editing the image
I applied the Evolution Preset’s “B&W Rugged Crisp” to the picture. I then
- bumped up the clarity and
- decreased the exposure until I started to see some detail in the sky and the edges started to darken a little.
Photo summary
It turned out exactly like I had envisioned it in my head before I took the shot.
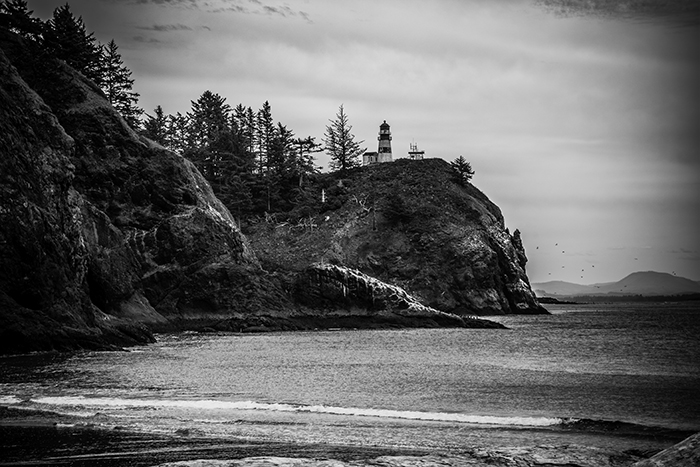
Part 4: Conclusion
In conclusion, when taking pictures of popular landscapes, try and look at it differently. Find unique vantage points while keeping in mind how you will process it.
Will it be black and white, or will you add more color and/or drama to your shot? You have the power to change the popular and overdone landscapes into something new. And above all, have fun!



Great article. Trying to get something different when there’s so many shots of the same thing is a real challenge.
Loved the hole in the rock, Amy! I like your adventurous approach, and this one plus the black and white lighthouse really pay off.
Best wishes
Thanks Pete! Amy did a great job on this one!
Thanks for helping me “see” a little better!
Nice article with concrete examples to get your creativity going and step outside the typical shots. I really the picture fro the hole viewpoint and the lighthouse one.
Lovely pictures and expert post-processing to improve the overall quality. Cape Disappointment was named by the expedition of Merriweather Lewis and William Clark during their trip in 1804-1806 to find a waterway route to the Pacific coast. Obviously, there is no direct waterway from the Atlantic coast to the Pacific coast…..when they reached that point they were disappointed that they had not actually reached the Pacific Ocean, but an inlet – hence the name.
Thank you, Pete!
Thank you, Mike. I had a lot of fun writing and processing the new pictures at the same time. :-)
Thank you, Maggie. I must admit, I love taking pictures through holes in big rocks. Go figure. LOL. Thank you for your kind words. :-)
Fantastic article, Amy! Going to have a play with some shots I took yesterday!
Tell me, in the first 2 examples you say you decreased/increased the exposure by 5 – did you mean 0.5?
Absolutely wonderful, Amy. Thank you.
Thanks for the interesting article. I’m ready to go back to some of my own photos and do some different processing :).
I love this. Outside of the box is my favorite spot. Thanks Amy!
Opened my eyes to creative Lightroom…thank you Amy
Great post – it’s nice to see another photographer’s thought process.. I loved the hole in the rock.
Nice work Amy – really interesting that you outlined your thinking processes. Well done.
I enjoyed this article very much. It’s a matter of training your eye to see things that other people don’t. I loved your post processing very much. That you so much for this valuable information.
Disappointed, was expecting an article about looking at composition differently. As a new photographer, that would been very helpful. Even started out that way…but then became all about post-processing. Blah!
Hi Shannon,
Thanks for your input. There are a lot of different avenues to discuss a particular subject, this one was focused on composition and editing. There are other posts on the blog that might be more what you are looking for. For example, this one: https://hackingphotography.com/6-tips-to-instantly-improve-composition/
I hope you find this one more helpful!