Hi guys, its Mike Newton. I have a special treat for you! Robert Wiggers, a Hacking Photography subscriber, is going to show you how he creates awesome , artistic, and unique smoke photos. With no further ado, I’m passing it over to Robert!
Enter Robert Wiggers from Beyond Life Photography
Hello my fellow artistic shooters!
No matter what season it is, you always have an evening with nothing to do. And those evenings can creep up on you without you even noticing it. To make sure you can make everything out of that evening, I want to show you something you can do with almost nothing but household items and basic cameragear. Let’s get started with shooting smoke!
Supplies for smoke photography
Here is a list with things to grab:
- Couple of sticks of incense, or something else that creates smoke
- Anything that can hold a incense stick
- Lighter
- Black (or very dark) backdrop. 80x80cm is large enough. I used a schoolboard I stole from the kids. I gave it back, don’t worry :)
- Flash
- Remote/receiver for said flash
- Desk light
- Any camera
- Any lens, but if you have it, use a macro lens
- Lightroom
- Flash color filters
The set up for smoke photography
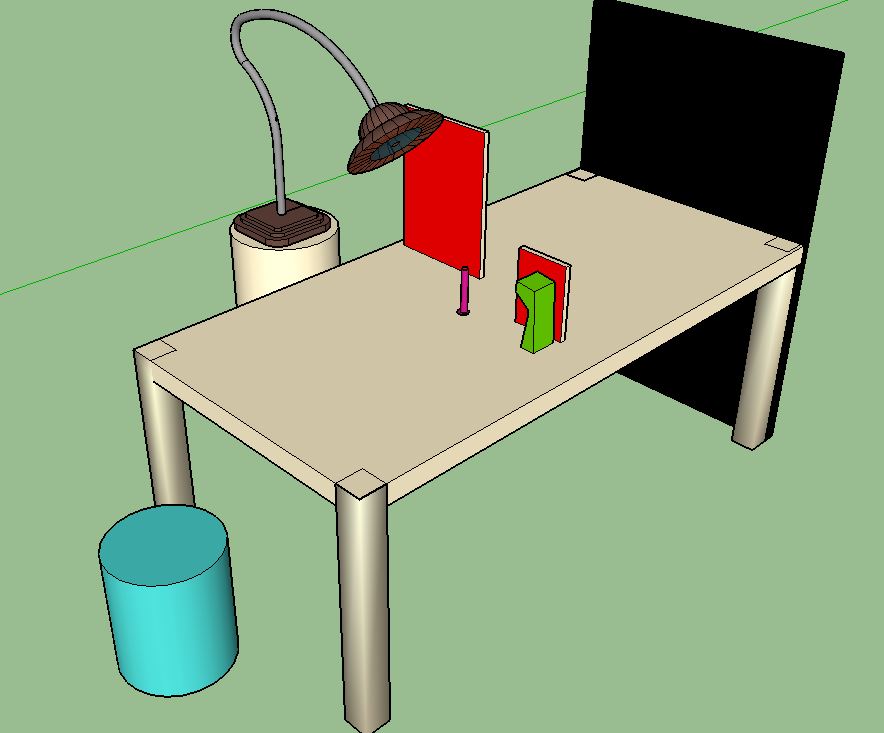
Let’s get stuff set up! For starters, find something like a table that has enough room to fit the incense sticks but also your elbows to lean on.
That camera can get heavy during this process, but it’s also a great way to keep the camera as still as possible, but also be able to move a bit when needed. Depending on your gear, put the incense stick in the middle of the table, and at the end of the table the dark backdrop. I used a black school board from my kids. To the left of the incense stick I have tablelamp to make the smoke visable so you have something to focus on.
On the other side, to the opposite of the lamp I have a flash with remote. Any flash will work.
I also have a whole set of different colored filters on the ready to be used on the flash.
Both the flash and the table lamp have a piece of cardboard next to them to make sure the light doesn’t spill on the backdrop. This is a representation of the way I did it. But feel free to change anything. Get creative!
Thoughts on using a tripod for smoke photography
Something that is not on the list, but some people say it should, is a tripod. If you have trouble holding your camera for long periods of time, a tripod is the way to go. But the smoke from the incense stick will be moving from left to right, and front to back. Even when you have all the windows closed, your breath will make it move.
It’s quicker to move your camera with your hand forward or to the side, then try to follow the smoke and focusing on it while the camera is on a tripod.
How to compose smoke photography shots
There are two types of composition you can get your hands on from this point.
1. Wide shots with the stick and the smoke
If you want to get a shot that includes the stick and a great height of smoke, you will have to take your distance from the incense. This also means your backdrop has to be big enough.
2. Close up detail shots
If you want a detail shot, prepare to get up close and smoke-personal. I’ve noticed that this will get me the best swirls, bends, and streaks of smoke. This also means you can work with a smaller backdrop. I used a Tamron 90mm 2.8 and noticed I could have worked with a backdrop as small as 50 bij 80cm.
How to photograph the smoke the right way
1. Get physically comfortable
Now we start with the fun part, the shooting. Make yourself comfortable and focus on the incense stick you just lit up. Take a few good deep breaths, calm yourself down, and shoot.
There is a bit of a learning curve here and I can assure you that the first 20 or 30 shots will be rubbish. But just keep on peeking on your screen and learn from every shot. Remember that peeking means you are moving air around that will stir the smoke. There are ways to minimize movement in the smoke. I tried shooting tethered to an iPad. My Canon 6D has wifi, and it worked like a charm. Maybe you can pull something similar yourself with a laptop or desktop.
2. Get the smoke moving around
But for really nice curved smoke you need smoke that moves around. A little piece of cardboard can help you whoosh little bits of air towards the incense and get the smoke moving around. Don’t whoosh too hard or you’ll end up with one big cloud of white nothingness.
If this happens, just wait a bit and it will drift away. You can also use pocket rockets. Try to shoot little puffs of air towards the incense. I also used a spoon. Yeah, that works too!
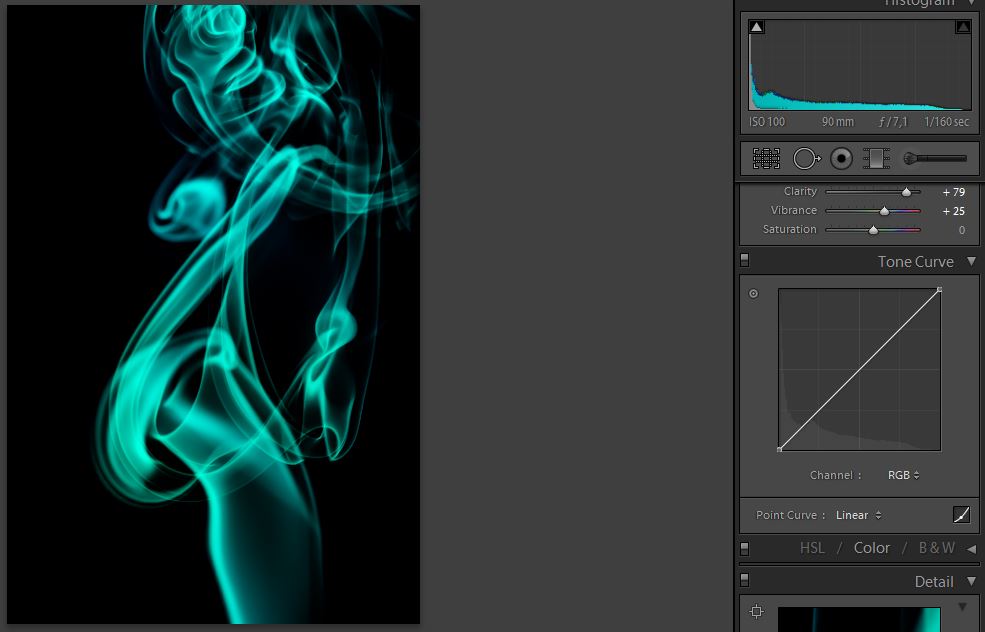
3. Getting colored smoke ready for post production
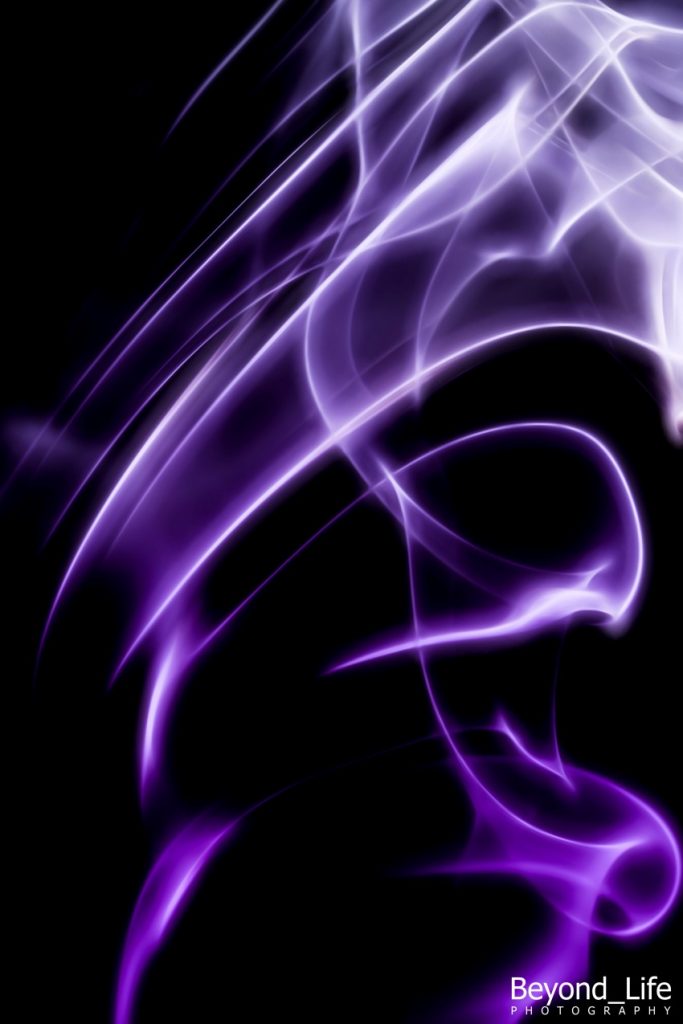
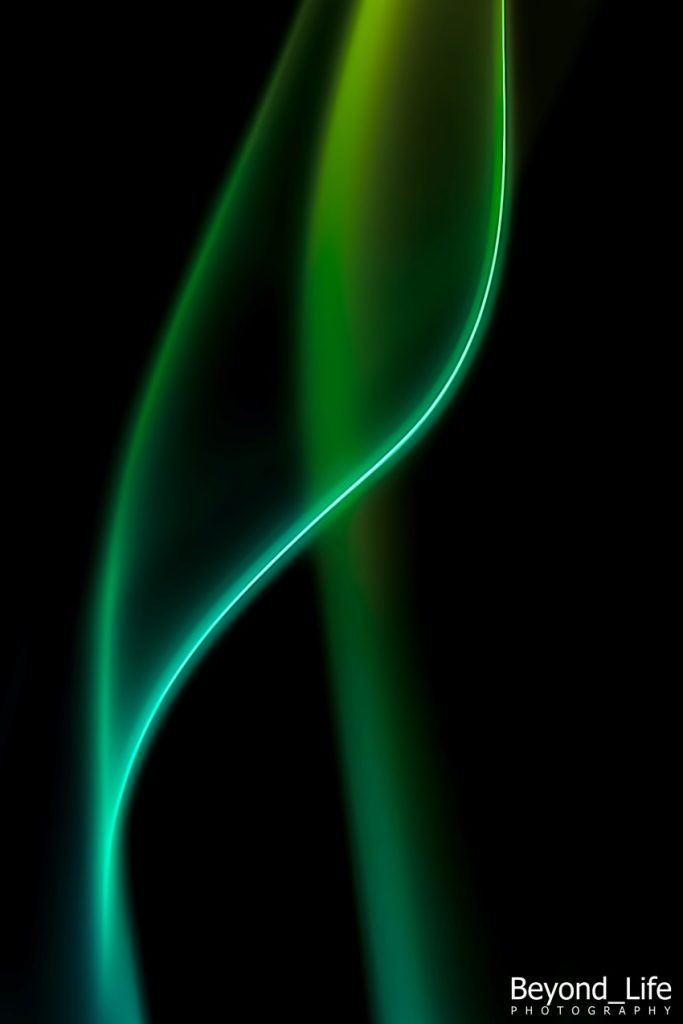
A big step towards the kind of editing we are doing later on is colored smoke. You make colored smoke by putting colored filters on your flash; this is what creates the color.
The best shots you get when you tilt the flash and put two colors on it, like yellow and blue. You can even overlap both of them and have three colors on your smoke: Blue, green and yellow. This is not a precise science. Play with it till you like it. You get the best result when you use colors like red and blue, or green and purple. Orange and red won’t work as well.
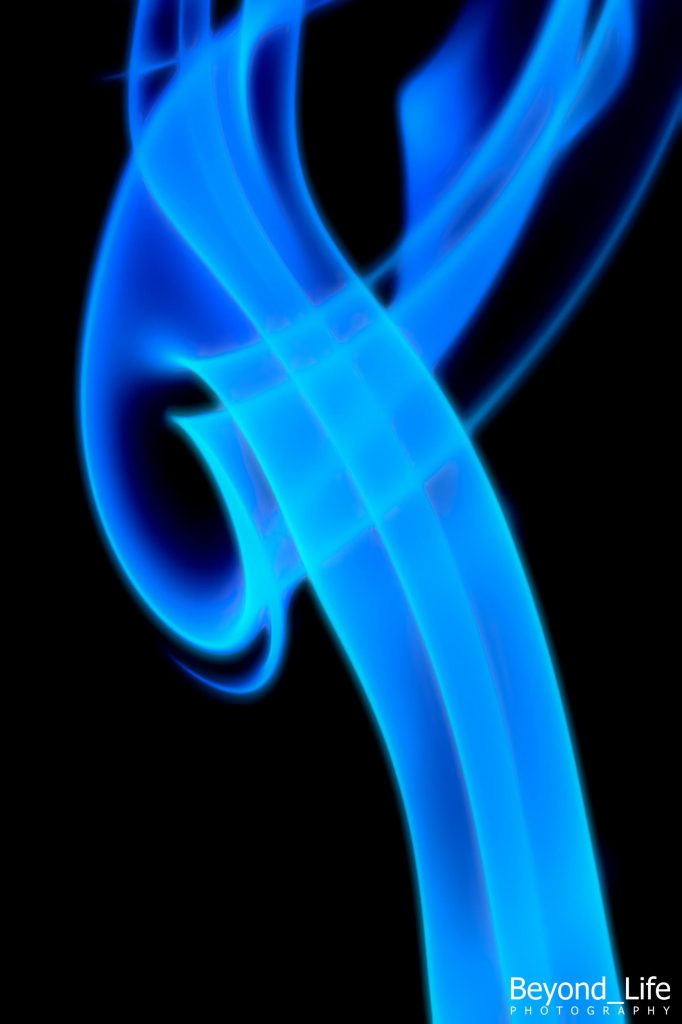
For this shot I used a single dark blue filter and edited it in Lr with nothing more then lowering all the clarity, and upping the luminance while lowering the sharpness. By the way, I still use Lightroom 4, so things may look a bit different if you use Lr5 or Lr6. It all should work the same. And although I don’t use Photoshop, these effects can be achieved in Ps the same way. Just don’t ask me how :-)
Editing these shots in Lightroom is all up to you. All I can give you are some tips and tricks you maybe didn’t think of.
Creating awesome smoke photos with negatives
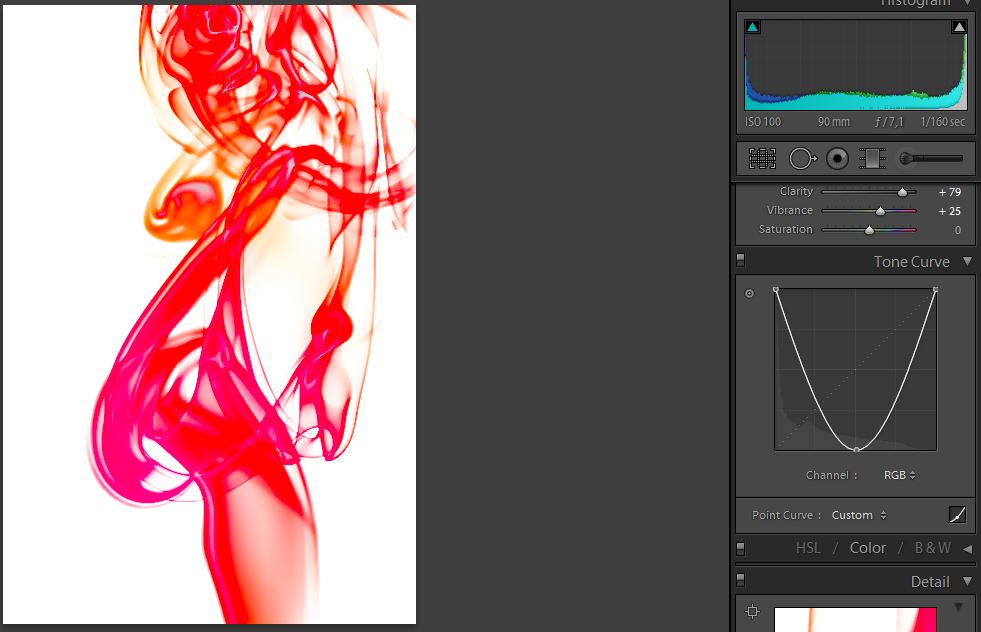
Turning these shots negative creates really interesting effects! Turning photos into their negative version is simple. Go to your Tone Curve section in Lr and set it to ‘Linear’ if it isn’t already.
You can click the ends of the line and move them to get effects. Drag both ends of the line to the opposite corner. When you move the left bottom corner, you will notice the image turns white. Now drag the other corner to the bottom right, and the image turns negative.
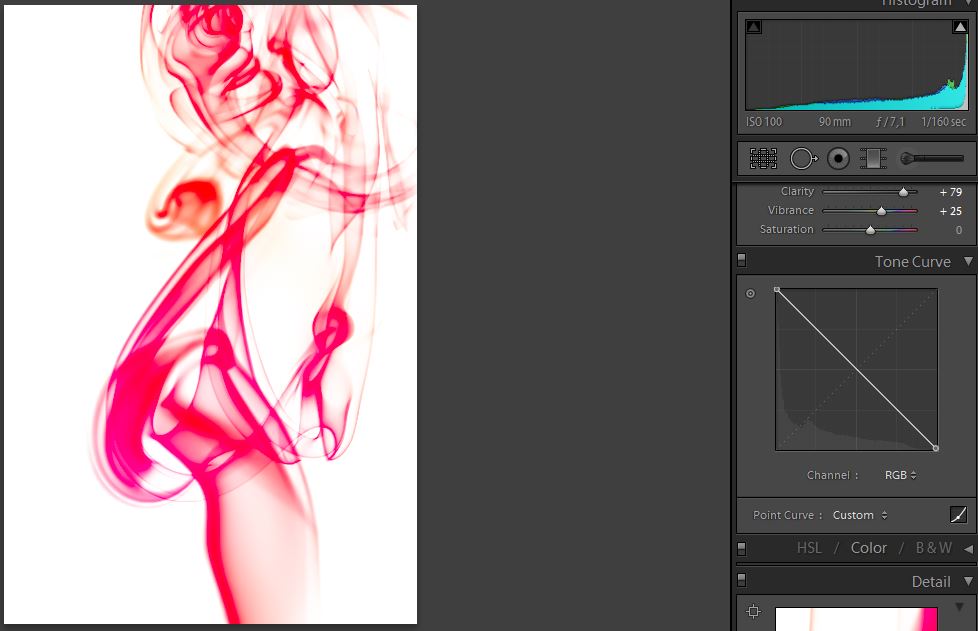
You can also move just the left lower end of the line to the top left of the curve and then drag the middle of the line down to the center. It will up the saturation and still give you a negative, with smoother edges and a not so white background around the smoke lines.
Why the colored filters/gels are important
This is the part where the choice of filters on your flash get important. Not all colors will cause this sort of coloring on your smoke while editing it.
I tried a lot of colors and still have no clue what happens in Lightroom later on. Again: keep trying.
The shots I’ve showed you here are all edited without the Hacking Photography Presets. But you can get freaky wild with them if you apply the presets before you edit the Tone Curve. Some presets from the Color Blast series will add extra colors which will add extra dimensions when you fiddle with the Tone Curve.
Something that can also change an image completely when it’s negative is white balance.
Do you want more defined lines? Add some massive amounts of clarity. Be sure you spot check your image at 100% and do some spot healing.
Quick Note on sliders for negative photos…
A little sidenote about turning shot negative: all sliders now work backwards. Yeah, you didn’t think about that, am I right? If you want a brighter background on the image you just turned negative, make sure you slide the Black slider. Not the Exposure or White slider.
Another side note: with turning these images negative, you’ll end up with more white space which doesn’t have any info in it. The original file I exported before turning it negative was 14mb. After turning it negative it was a little 4mb file. If you want to print these, make sure you have the right export settings.
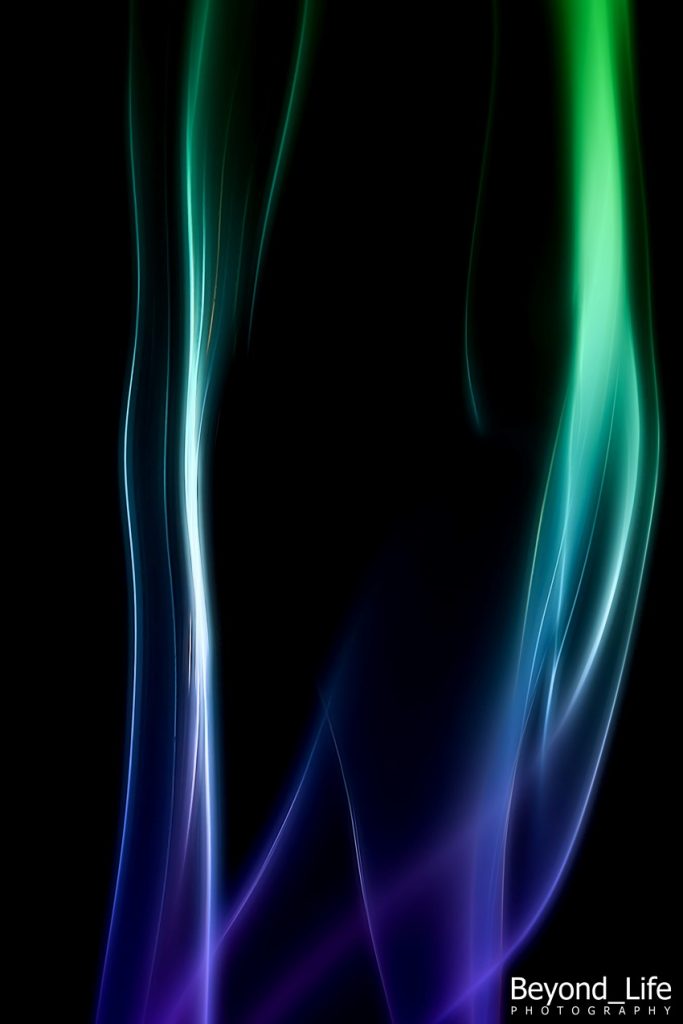
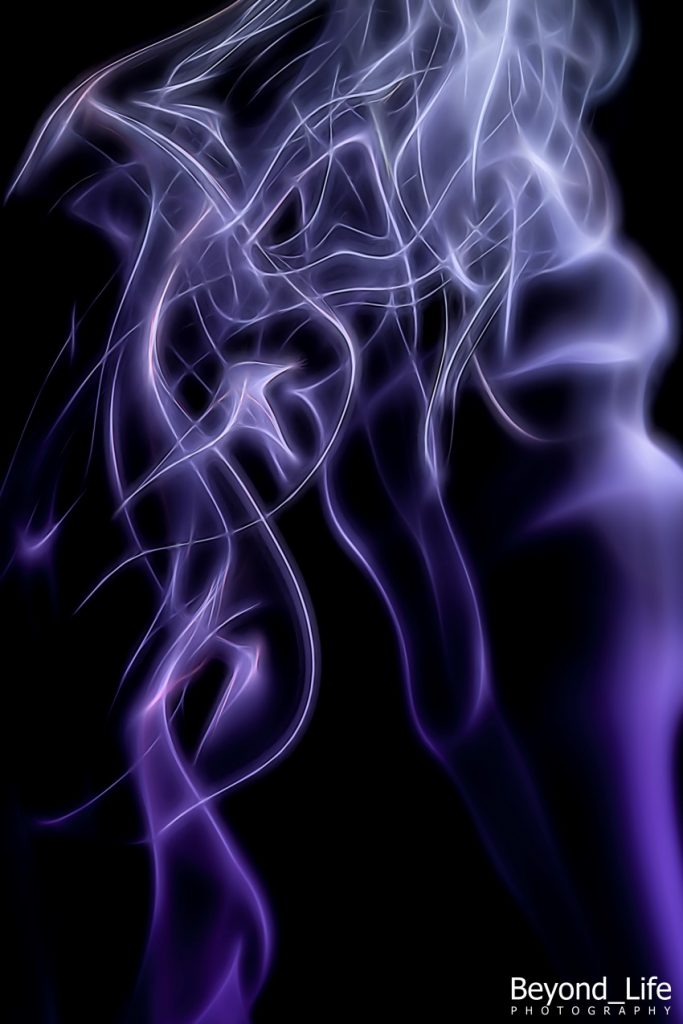
Another thing you can do with the editing part is the use of other programs. The next few shots were edited in Topaz Glow, before I edited them in Lightroom.
How to make your smoke photography even better!
Like I said a few times before: You can go crazy with smoke and Lightroom, but I have a few more ways you can make them even better.
How about adding more sticks of incense, or add mirrors to your base setup and shoot a flair of smoke twice in one shot? Or how about adding some vaseline to a unused UV filter while shooting? Maybe you have some Lensbaby optics? Add them to the collection and shoot away.
In summary
Hopefully I’ve shown you how you can fill a lot of rainy nights with something simple like smoke photography. The best part is that no matter what you do or how you do it, you will always end up with one-of-a-kind shots. No smoke image is the same and you will never be able to recreate that particular shot. Out of the box thinking is key here!
Have fun shooting!!!
– Robert Wiggers from Beyond Life Photography.
P.S. Mike Newton here again. I want to give major thanks to Robert for officially being the first guest-post on Hacking Photography! He did an awesome job explaining something unique to his style that I had no idea about.
If you are interested in doing a guest post here on the blog like Robert did and sharing something interesting with the Hacking Photography community shoot me an email at mike@hackingphotography.com with your ideas!
Wow! My photography and editing have been helped so much with the first two Monthly Edits! What a bonus. Thank you, Mike, and Robert for sharing such a cool idea.
Our pleasure Donna! I’m glad you’ve enjoyed everything so far :)
Thank you for sharing your secrets Robert, and thank you Mike for giving talented members a forum to share their knowledge. What a bonus!
Guys, this is perfect tutorial: specific, achievable in a reasonable timeframe, brief but packed with info, crystal clear and it allows all of us to get creative. Thanks so much
You are welcome Kim, Robert is a very talented writer!
Thanks Phil, I appreciate the kind words!
Hi Mike. Great tips and a vice as always so thanks. A few questions if I may pls. 1. How many devices would I be able to install these presets on. 2 How long would I have to download the presets as I currently work in remote Qld with very little Internet or phone service for that matter. 3. How long does the promotion run for. Cheers and thanks. Chris.
Hi Chris, Thanks!
1. As long as you own the devices you can install them on each of your computers.
2. The download link will stay active after you purchase. If you loose it I can always resend it to you.
3. Which promotion are you referring to?
Hi Mike. Thanks for the reply.
The promotion i was thinking about is the 100 Lightroom presets you have on offer for $44 if I’m not mistaken.
I just came across this tutorial. Fantastic! Thank you.
Without having even tried it yet, being an electronic/light experimenter, I’m thinking colored LED’s could be fun with this too.
Again, thanks ..
Thats a great idea Larry! I bet the LED’s would look awesome. Do me a favor – if you shoot some with the LEDs please share them with me!