Photographing at night can seem daunting at first, after all our cameras are all about catching light. Of course you can add extra light to your scene but it’s not always convenient to carry extra gear with you.
I don’t always want to carry extra lighting with me and I’m sure there are times you want to travel light too.
Here are some tips and ideas for shooting at night. All you really need for this article is your camera, so have a read then get out and shoot.
Think about your settings
With less light your camera compensates by slowing the shutter speed. Slow shutter speeds increase the chances of motion blur. If you don’t want to use a tripod you can change your settings to make the camera more sensitive (ISO) or to let more light in (Aperture).
1. Raise your ISO
The general rule is keep your ISO as low as possible, but raising the ISO makes your camera more sensitive to light and allows it to capture more detail.
Remember that just by bumping your ISO up from 100 to 400 you can use a shutter speed that’s four times faster. Most modern cameras can cope with higher ISO settings than the first digital cameras out there.
The disadvantage to raising the ISO is that you’ll be adding graininess or noise to your shot so only raise it as far as you need to.
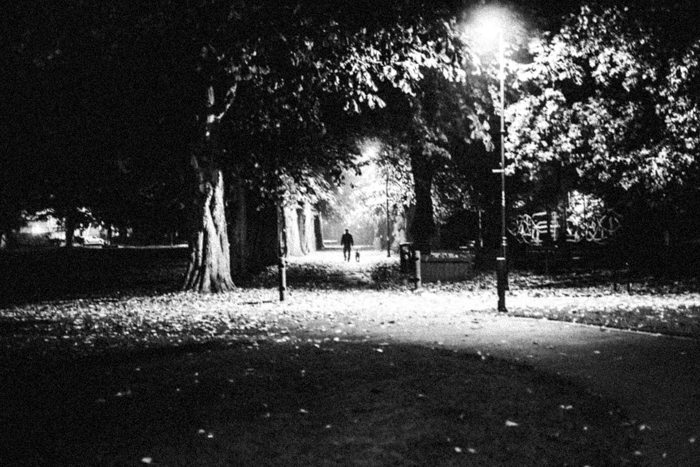
I shot this late at night in my local park with my Fuji XT10 using an ISO of 640
2. Open your aperture
Wide apertures let more light onto your sensor so you can raise the shutter speed. The catches to opening it wider are that you narrow your depth of field and lenses that open up really wide are expensive.
Prime lenses are cheaper with less to go wrong so a lens that will open to at least f/2.8 can work out to be a really good investment.
Don’t be afraid to buy second hand there are some great deals to be had. The bad news for anyone wanting a zoom lens that will work at f2.8 is that it’s going to cost a lot.
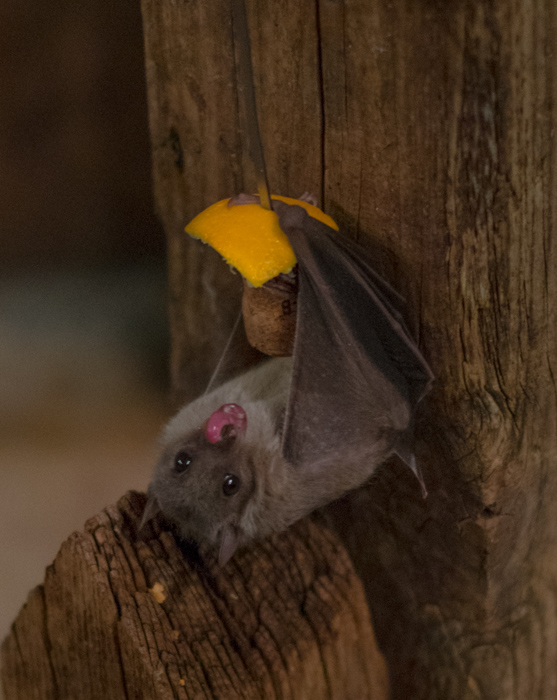
Bat caves have very low light so it’s crucial to get the settings right. I took this shot using F/1.4
3. Pre-focus your shot
Getting a good focus on a dark subject can be a challenge. Most cameras use an area of high contrast to focus on.
If it’s really dark you will need to create that area of high contrast by using a flashlight on your subject and pre focusing. OK so I said you didn’t need any equipment but I always keep a small torch/flashlight in my camera bag.
[Mike here: I talked about this in the last post but I recently bought this zoomable LED flashlight for $7.99 on Amazon and have been totally blow away by it]
4. Long exposures
Long exposures are useful for two main reasons. First, by keeping your shutter open for longer it lets more light in so your camera can record more of the scene. Second by keeping your shutter open you’ll have the chance to show motion.

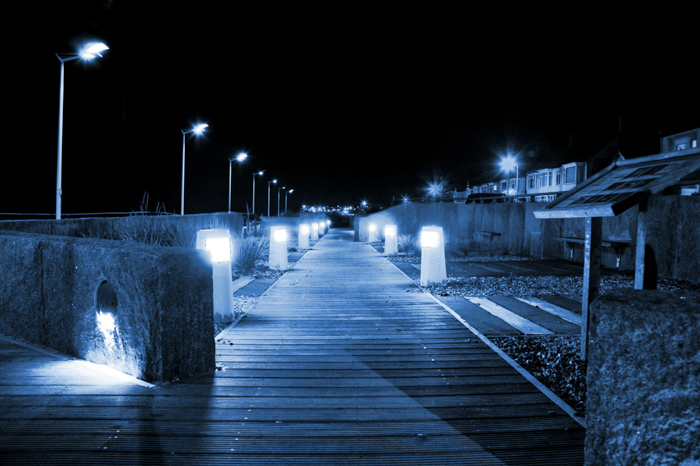
For this beach shot I chose a long exposure of 0.8 seconds. This let enough light into my camera to record the scene but was also slow enough to show a slight silkiness to the water.
You can make moving water appear like smoke but you will need a much longer exposure of a few minutes or more.
Tip: The most important thing to keep in mind is that your camera needs to be completely steady. Use a good tripod and the camera’s self-timer to release the shutter. Take care at night though as it’s really easy to trip over tripod legs in the dark.
Shots to try after dark
As always the best way to learn a new photography technique is to grab your camera and get out shooting.
So here are a few of my night time shots to get you inspired. Don’t forget to review your work on your cameras LCD screen as you go.
1. Streetlights
Streetlights can add interest to your composition and emphasize the darkness by creating a pool of light that implies isolation. If it’s more of a landscape feel you want then let the streetlights act as a leading line that pulls the eye into the distance.
I didn’t have a tripod with me for this shot but fortunately there was a small wall I could rest my camera on. I used a reasonably narrow aperture of f/14 to keep a good depth of field. It also gave me those starbursts on the streetlights.
You can also use streetlights to light your model during a portrait shoot. By letting the light shine down on your model you can use the hard light for a close up, full frame that’s merciless on your model.
By shooting wide you can give the impression that they’re all alone.
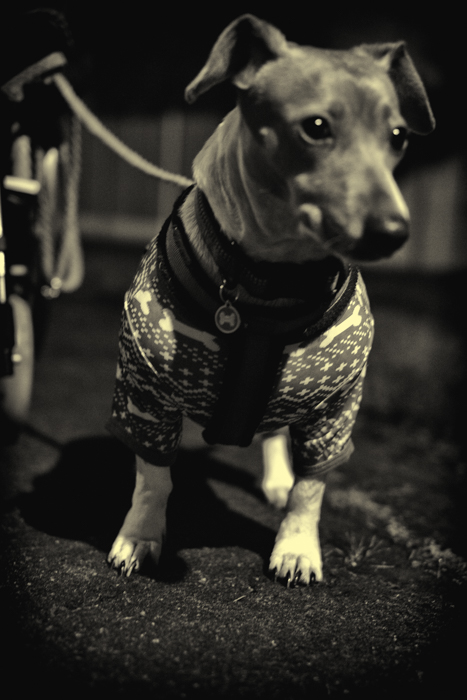
As you can see, this shot scores highly on cuteness but the wide aperture I needed gave me a really shallow depth of field. With a model who’d keep still I’d have used a narrower aperture and slower shutter speed.
2. Shoot the moon
The moon can be a tricky subject often appearing as an overexposed blob in the corner of a shot. But with a little care and a big zoom you can catch all the surface details.
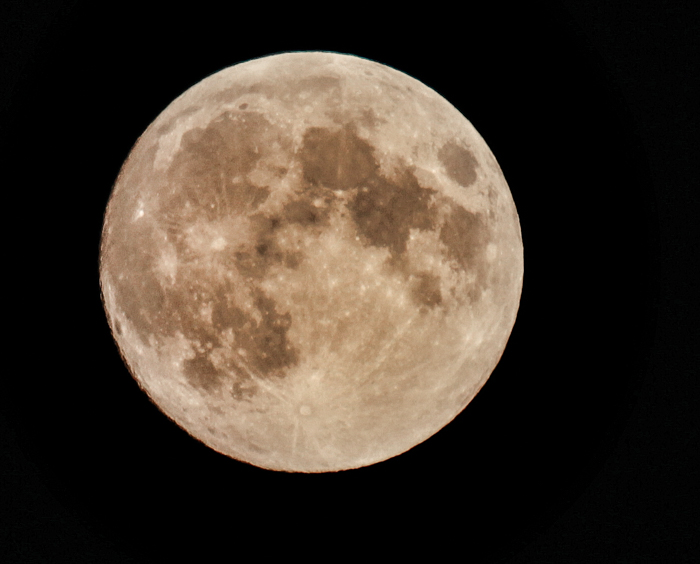
I took this shot in my back garden using a tripod and 300mm lens with a 2x extender. I chose an ISO of 200 and an aperture of f2.8 to increase the shutter speed.
At this zoom the moon appears to move quickly in frame so a fast shutter speed is essential.
3 Reflected lights
Reflected lights in water make beautiful subjects but are best captured at night. This is a shot of Plymouth harbor, UK at night.
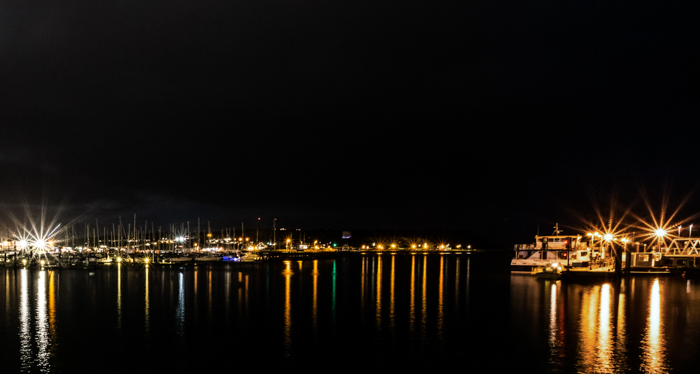
I used a Gorillapod sat on a wall to steady my camera. The ISO was as low as my camera would go at 200. I chose an aperture one stop below its narrowest setting (f16) so I didn’t push my lens to its extremes.
Once again, those starbursts come from the narrow aperture. Luckily it was a still night.
If it were windy I would have opened the aperture a little and increased the ISO. This would have raised the shutter speed to control any motion blur.
4. Illuminated statues and lanterns
Lit statues and lantern displays add a welcome splash of light and color to a dark night. They make great photo subjects.
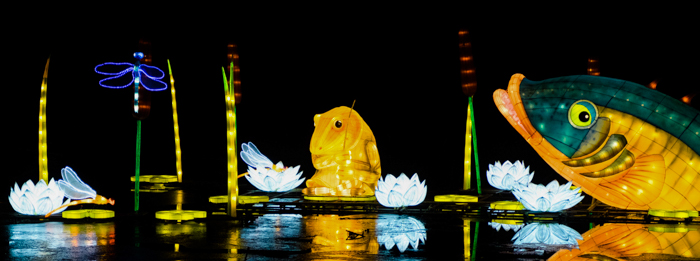
I took this shot at a local lantern display. Despite the darkness the bright lights meant I could shoot handheld and expose according to the brightest areas for a fast shutter speed. The composition is helped by some great reflections.
5. Light trails
Trails of light can add a lot to a scene but they’re not usually enough to make an interesting frame on their own. Use them to add action or life to a scene that’s already well composed and arranged.
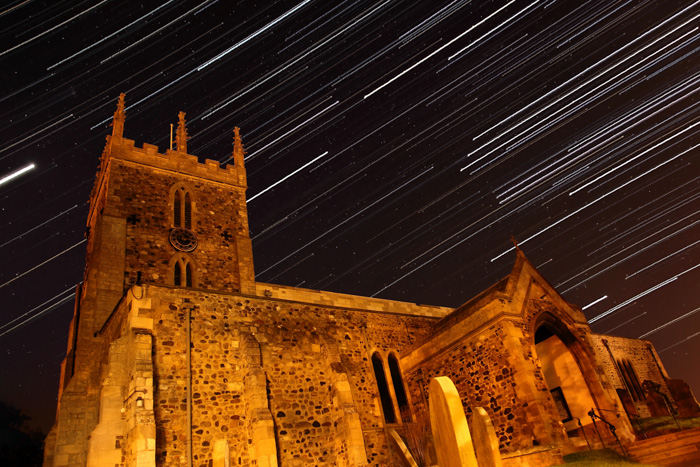
This shot of a local church was the result of stitching together well over an hour’s worth of 30 second exposures. There are plenty of options for combining a set of shots but the easiest I’ve found so far is Startrails.
The big tip for a scene like this is to keep your camera still and take shots continuously. Make sure you set off with a full battery and empty memory card.
Finishing up
Many of us are nervous to get our cameras out after dark but there you really can get some great shots. With a little thought about your camera settings you can take some great shots so why not have a go?
Above all though, if you’re out at night, stay safe. Think about where you’re going and if in doubt, take a friend.
Helpful Resources
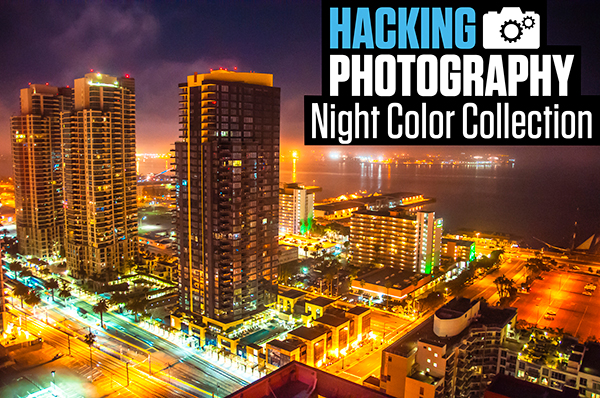
[Mike here again. If you like shooting low light photos and night photos in general, feel free to check out my Night Color Lightroom presets.These were designed to help correct tricky nighttime white balance, bring out more colors at night, and bring more ‘pop’ into nighttime photos.