Light Painting: A Crash Course.
There are certain photographic techniques that most photographers have no idea where to start; for example, light painting. However, if it is shown and explained to you step-by-step, making it more easy to understand and not as impossible to learn, you will be instantly hooked, as I was.
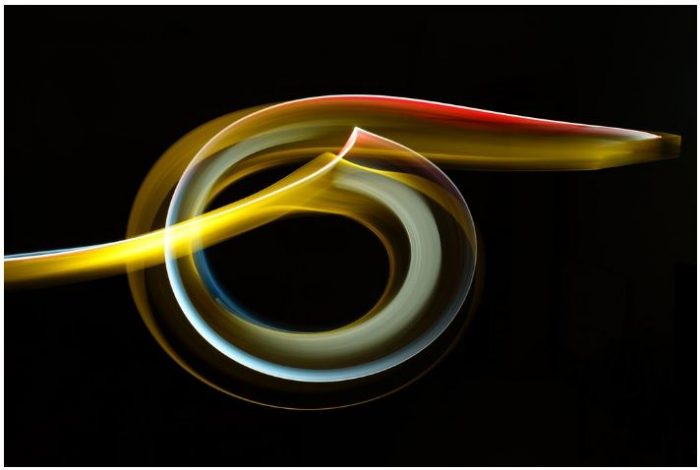
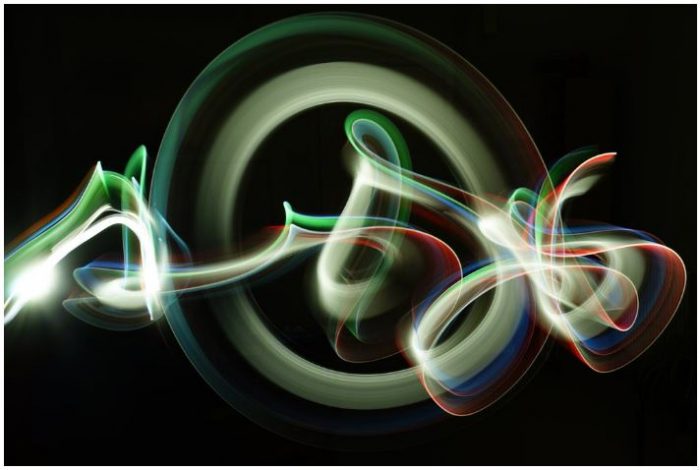
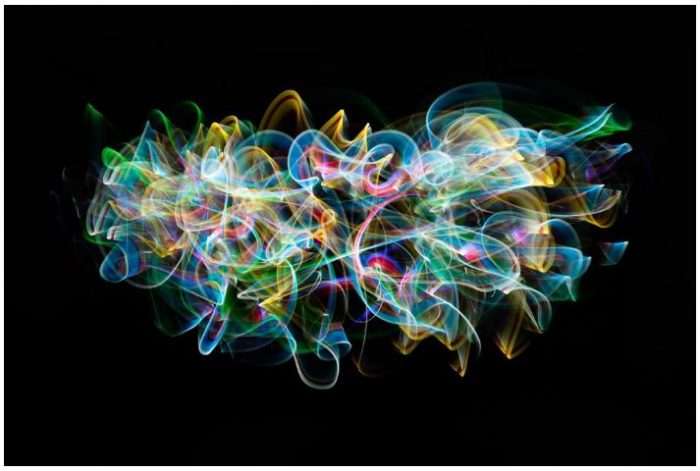
Light painting is a unique type of photography, but easy to learn once you get the concept. In this crash course, I will show you some of my work, I will tell you how I made it, and the settings and the gear I used. I will also provide some history, tips, tricks, and how to get started from scratch.
A Normal Photography Shot
On a normal day, taking a photo is nothing more then letting light hit the censor of your camera for a period of time.
Whether you are shooting landscapes, wildlife, macros, or portraits. 99 out of your 100 shots will be shot with settings your speed set around 1/200, ISO will probably be set around around 200, and you will more than likely have your aperture set between f/1.8 and f/8.
However…
Light painting allows you to stretch these settings between the two most low light times of the day, dusk and dawn, making it easier for you to paint with light. Literally. Painting.
Your light source can come from anything: a flashlight; Star Wars lightsabers; Pixelsticks; steel wool; glow sticks; and colored paper or bike lights. The only thing that is holding you back is your imaginatio
Different Types of Light Painting
Before we continue, let’s talk about the 3 different versions of light painting. For an in depth look at the history of light painting, have a look at this link. You will find the history behind it fascinating.
Kinetic Light Painting:
The first type of light painting is Kinetic light painting. With this type of light painting, the light source stays stationary and the camera is moved to create color or design within the frame.
For example, holding your camera in your hands and while using a long shutter speed and moving the camera around while using the light from the moon to create a drawing. Another example for kinetic light painting is camera rotation.
Using a rotation tool, you rotate your camera 360 degrees during the long exposure at several intervals also while using the light from the moon to create your drawing.
Off Camera Light Source:
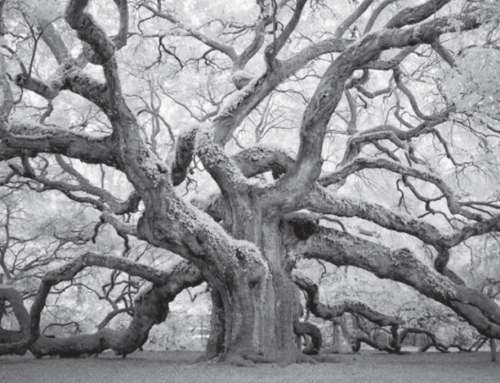
This second type of light painting uses light sources that can’t be seen in the end result. Envision yourself using a flashlight to light up a tree in the center of your composition.
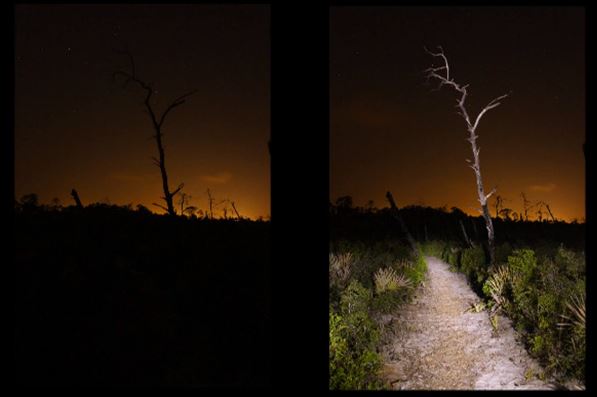
Image from Lightpaintingphotography.
On Camera Light Source:
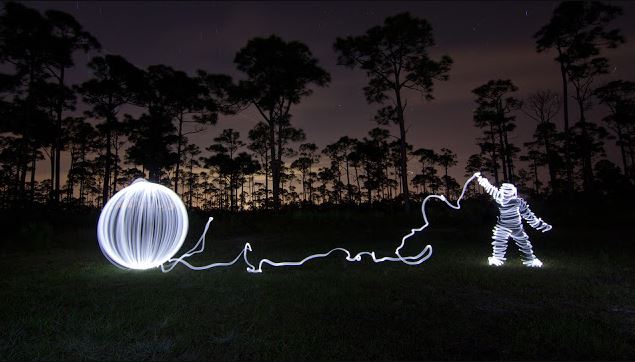
This version is where the light source is seen in the end result by using a lightsaber, your bike lights turning to create an orb, and/or burning steel wool or x-mas lights dragged on the floor. This is the version of light painting we will be digging into in this crash course. Get ready!
To start, what do you need?
The “how-to-start-lightpainting” list is a rather short one:
- A camera with manual mode, preferably in bulb mode;
- A tripod or any other solid and shake free surface, like a rock, a table or any medium sized mountain;
- Not a must, but a remote is recommended;
- Any lens. A super wide angle is amazing if you are trying to get stuff done in tight spaces or trying to grasp the wide open space of nature. But if you want to try something at tabletop level, a macro works good. 99 out of 100 times I use my 24-106 f/4 and it always delivers;
- A dark environment. Nature at night is great, but you can even get started at your kitchen table, bedroom or garden shed. Hell, even your average medium sized underground cave will do the trick; and
- Any array of light emitting sources like flashlights, bulbs, strings or children toys.
Let’s get started!
Let’s assume you have found, and set up, the three basics: a camera, tripod, and a light source. You may even have connected a remote of some sort (you can use your self timer if you don’t have a remote).
Get a drink because you will get warm. Before you’ll even notice, the night will be over so maybe even bring something to eat to keep you steady on your feet.
One thing I haven’t mentioned yet are your friends. This type of photography is fun to try on your own, but it is the help and imagination of your friends that will get the most out of you. Working together on something, a thought or a composition works better with like-minded people.
And please accept this tip from me: share anything you are thinking or wanting to try with the like-minded people you have there with you on-site.
If you are not sharing what you want or expect, the other won’t know what they can expect themselves. Speak up, discuss, explain and you will notice experimenting with light painting will go a lot easier.
Get into focus.
Without having anything in focus, nothing will work. But you are in a dark environment, so how are we going to get what is within the frame to focus?
The most simple way is to shine a light at the spot where you are going to work, focus on that spot and recompose. If you are with friends, put one of them on the spot, shine a flashlight in his or her face and focus there. If needed, recompose.
After you have focused, turn your camera into manual focus. As long as you make sure you perform in that same spot, everything should be focused for your shot.
Get your gear out.
It’s going to be dark around you so whatever you are going to use, put it in spots you can find in the dark. Utilize what’s around you – your pockets, your open bags, etc. I’ve even had moments where I had to hold a lightsaber in my mouth… Yeah.
A little headlight can help you with lighting up your surroundings when you are trying to get things organized. But your eyes will have to get used to the darkness, every time you shut off your headlight.
Start your exposure, start moving around and end the exposure. It’s that simple. Be as creative as you can be: write your name, create figures or illuminate a model, your friends, a rock or old wooden shed. Your imagination is the only thing holding you back.
It will be tricky.
You first shot will show a lot of light, or maybe none at all. This is the moment to adjust your settings. Because it is advised to keep your ISO as low as possible and making sure you have a long shutter speed, try lowering your aperture setting to let in more light.
It is of course the other way around if you have too much light in your shot. If the light circumstances keep the same, you will hit the sweet spot of your settings after a few attempts. There is no direct way to instant success here. Just keep trying and eventually you will get the hang of it.
Things get more difficult when you are in a environment that has light sources already there. Even the moon can be too big of a light source when you are using shutter speeds of 5 minutes or more.
Professional Examples/YouTube.
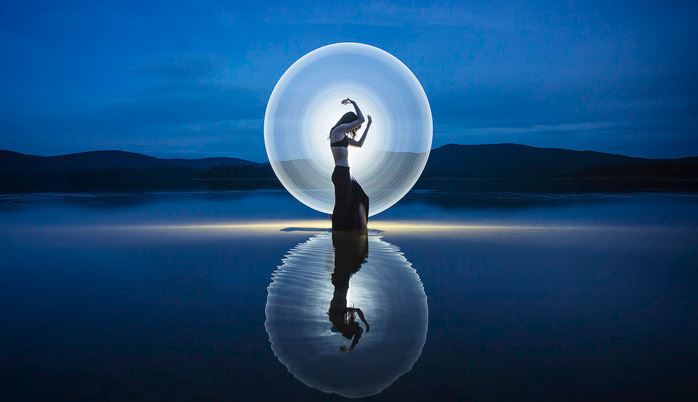
You can make it even more difficult by trying to light paint during the golden and blue hour. The well know photog Eric Pare creates stunning pieces of art during this period of the day.
Eric uses nothing more the fluorescent light tubing with a flashlight at one end and a cap at the other end. The tubes are available all over the world for just a few bucks.
Eric and Kim have recently uploaded a video on youtube titled “Tube Stories“:
Tube Stories is a new series we’ve envisioned over the last months. It’s mostly about the simplicity of our light-painting art, and the journey that goes with it. We’re creating this for our friends in the learning group. We’ll cover tips and tricks, travel diaries, dance, product testing, diy projects and much more. Recently, I came across a debate about whether light-painting is an art form or a technique. For me it’s clear, light-painting is a lifestyle.
This short description gives a lot to think about and I can’t wait to see the second video in this series.
Kim: http://instagram.com/kimhenry.dance
EriC: http://instagram.com/ericparephoto
Jason D. Page and Light Painting Brushes (LPB).
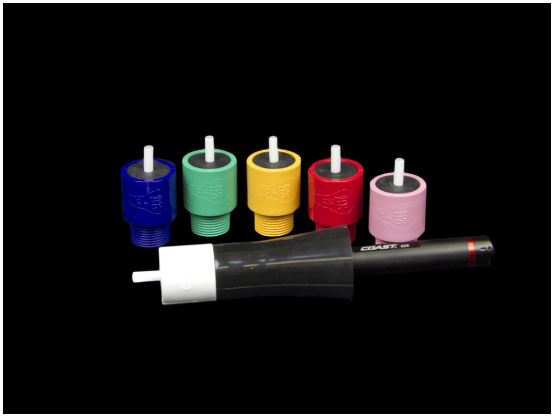
This is the point where Jason D. Page and his products enter our crash course. Jason D. Page has created a whole series of light painting tools called Light Painting Brushes (or LPB). I recently fell in love with this set of amazing light modifiers. These tools are used in combination with the best invention of Jason D. Page: the universal connector.
The universal connector is the key that unlocks the LPB system. This rubbery flexible tool connects to all the LPB tools on one end, and on the other end it fits to every flashlight between 0.975″ and 1.5″.

The LPB universal connector was designed to not only fit the LPB tools, but to also fit any standard plastic bottle. If you are an innovator/inventor, you can create your own light painting tools from any bottle.
The LPB range of tools, and why I use and love them.
Let’s break down the light modifiers and show what each of them can do for you. Remember, to be able to use each of these, you will need the universal connector.
Plexiglass Tools.
The LPB Plexiglass tools are made from hard and sturdy laser-cut plexiglass. The edges are sharp and smooth so that only though these edges the light exits. It creates defined sharp edges. Use it with colored gels on the edges and you can created any streak of light you want.
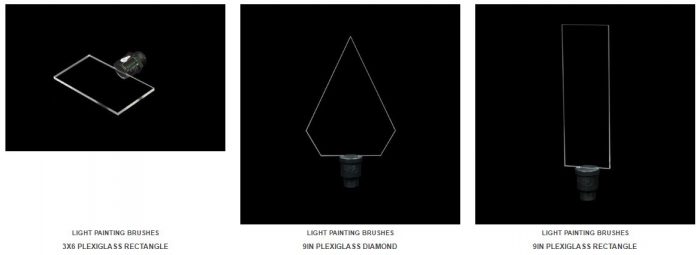
Image from http:Lightpaintingphotography
Below you’ll find some examples of what can be achieved when working with these blades when decorated with colored filters.
Images from Lightpaintingphotography
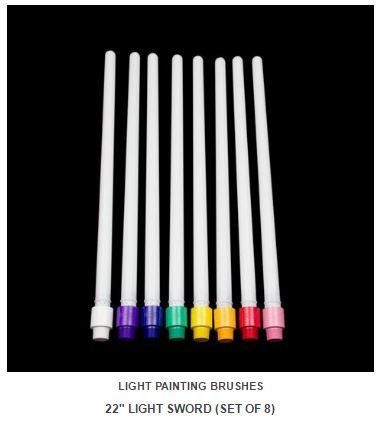
Light Swords.
The swords are my favorite tools from the bunch. These 22″ tubes are bit tapered to the end so they create an even lit tube from bottom to top.
Fiber Glass.
This is the modifier I love the most. It is a bundle of fibers that transport light. There are two versions: a coated version and an uncoated version. The coated (black) version only emits light at the tip of the fibers.
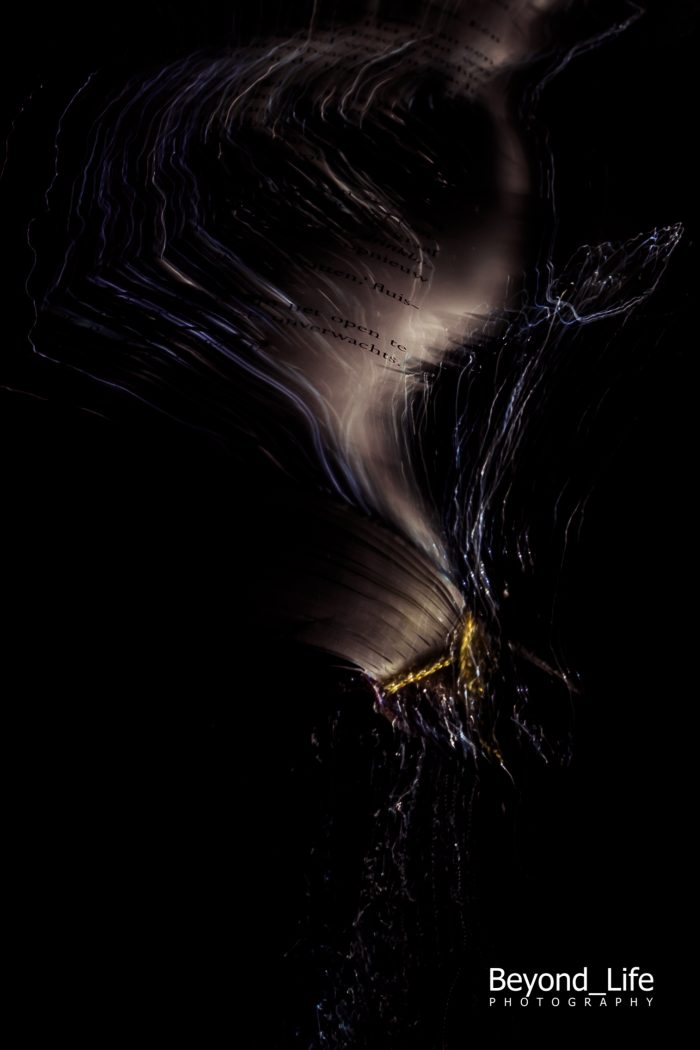
The uncoated version emits light from all the way through the fibers. You can spread the fibers with your fingers and let them slide over a book or a face, creating spooky and fairy tale like images.
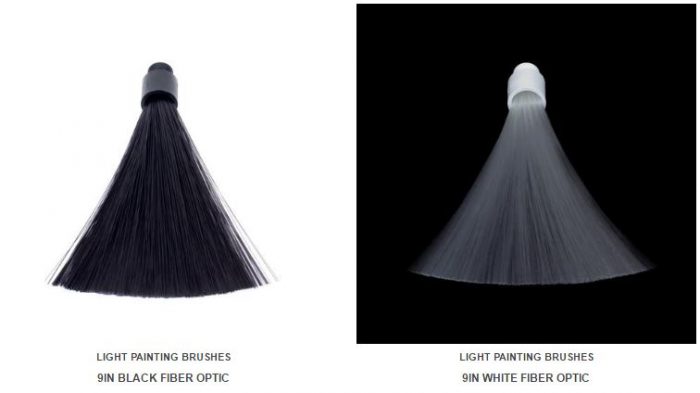
You can find some amazing tutorials on how to use these tools at this link. Below you will find an image I created with the Black Fiber Optic.
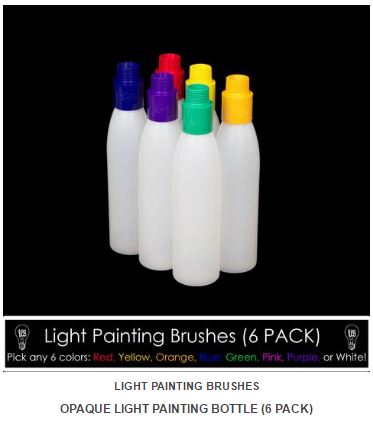
Opaque Bottles.
The bottles are made of the same material as the swords and almost emit the same light but in a smaller version and with softer edges.
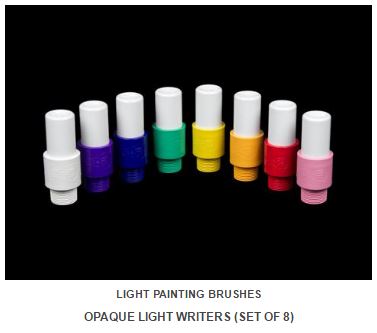
Opaque Lightscribers.
These tiny and stubby tools can be used for writing/drawing in the sky, and creating sky graffiti. There is also a translucent version with more defined edges resulting in sharper lines and harder colors.
![]()
Here is an example. If you want to know how to make a light painted man, check out this video:
Light Painting Tutorial, How To Light Paint a Light Man from Light Painting Photography on Vimeo.
The even smaller light pens create a fine line of light that are great for light drawing, light illustration, light writing, light graffiti, and light calligraphy.
Pointing the light pen directly at the camera while holding it still will create a starlight effect. The light pens are also the perfect tool for creating spirographs and phyisograms.
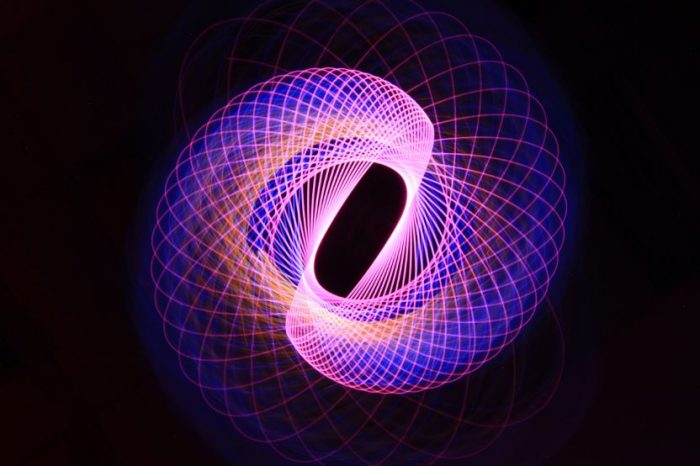
Image from Lightpaintingphotography.
Color Hoods.
Painting a scene with light is difficult because it’s hard to keep the light source (tip of your flashlight) out of the image. If you fail with this, you will end up with hard light spots or trails in the end result.
Jason thought of this and developed a hood with a color filter inside. The hood is cone shaped and therefore gives you all the light you need while still hiding the source.
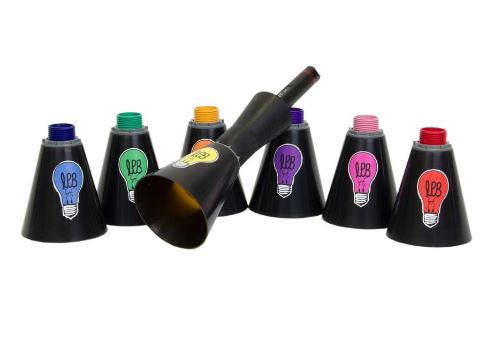
Here is an example of what I made with these hoods:
Image from www.wiggersrobert.nl
As you can see, this is a classic version of “Off Camera Light Source”. You cannot see the source of the light, nor can you see any tool within the frame.
Breaking it down.
I promised you to break down my work for you. I will show you the base settings below every shot. But keep this in mind: every shot also has a lot of LR time put into it. Let’s go!
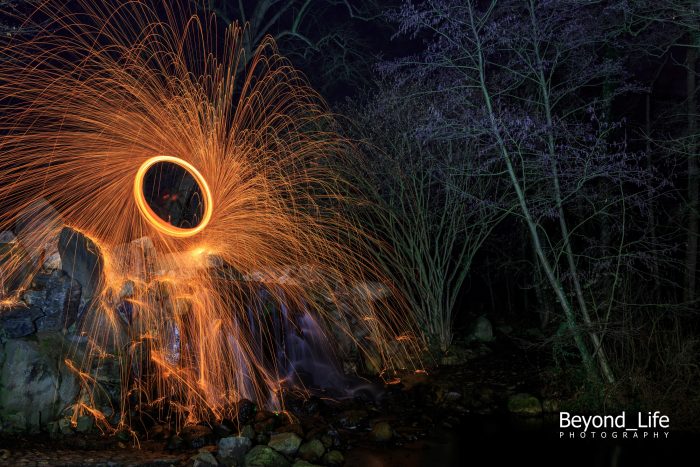
The Waterfall.
- Canon 6D
- Canon 24-105 f/4 L
- F/8
- Iso 100
- 103s
This shot was made in a local park, next to a waterfall. It took me a good part of an hour to get this shot the way I wanted.
With every try, I failed in lighting the trees on the right enough to get them to jump out as they do now. My friend stood on top of the waterfall and waited out of sight for me to signal him.
Before I utilized my friend, I was painting the scene with a huge flashlight. After my signal, my friend started swinging the steel wool.
Working together was a big issue here. My friend had to climb up on top of the waterfall with his headlight turned on. So I couldn’t start my exposure until he had found his spot and was ready to hide and appear again. Teamwork was important here.
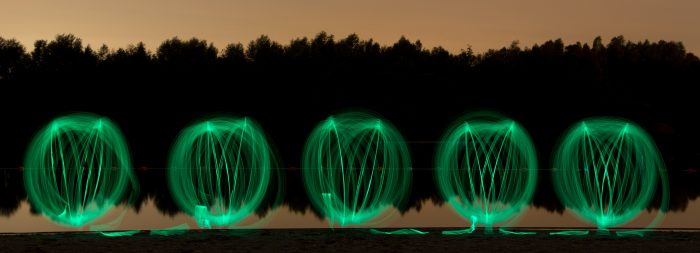
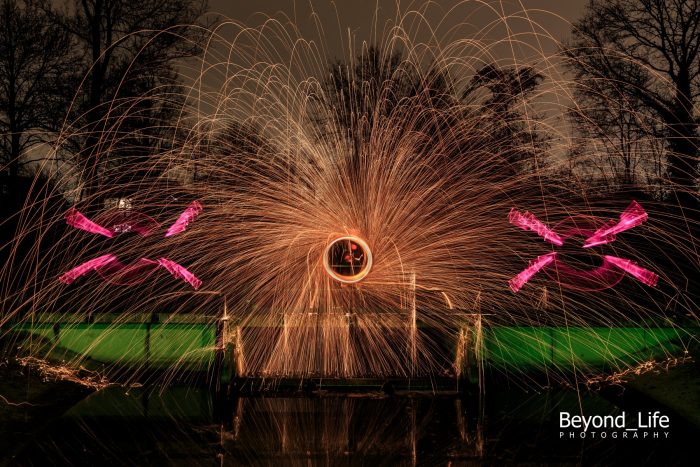
The Bridge.
- Canon 6D
- Canon 24-105 f/4 L
- F/9
- Iso 100
- 56s
There are several actions that created this shot. First, I used a flashlight with a LPB green dome to paint the bridge and sides of the water.
Next, I walked over to the left side of the bridge and made the strange figure with a pink LPB sword. Next, I did the same on the other side of the bridge making sure the composition would be sound.
After making the figures, I walked to the center, picked up the whisk with steel wool, lit it, and turned around to swing it.
Normally, you try to have some rope between your hand and the whisk to have a good use of the centrifugal force. I shortened the rope a lot to make the whole in front of my face as small as possible.
If you never tried swinging steel wool, search YouTube for “Steel Wool Tutorial”.
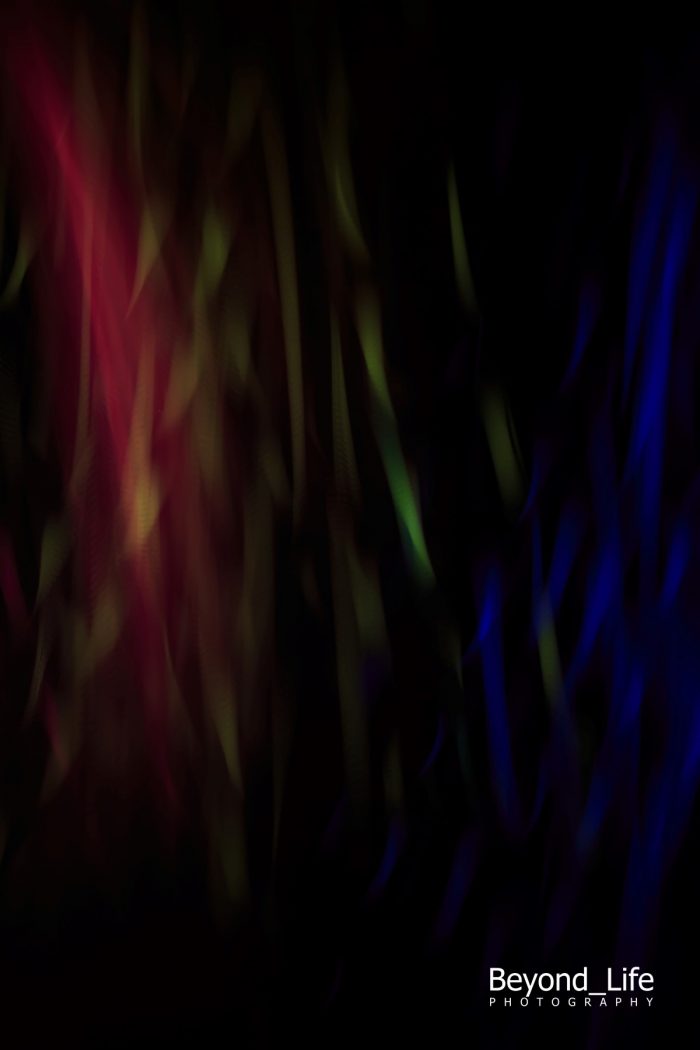
Paper Trails.
- Canon 6D
- Canon 40mm STM f/2.8
- F/7.1
- Iso 100
- 51s
It may surprise you, but this shot contains nothing more then falling confetti! On the left side of the image, outside the frame, there is a flashlight and three LPB color hoods. The backdrop is made out of a piece of plywood that I had painted black.
On the plywood, I marked the framing of my composition so I could visualize where to drop the confetti. I put the red hood on the flashlight and dropped the confetti; first on the left side of the frame, then on the right side of the frame, and then in the middle of the frame.
This is the reason the green confetti shows as it is in front of the red and blue confetti.
The Crash Course Ends Here.
There you have it. A rudimentary crash course on light painting. But is this it? Hell no! This is just the beginning. The sky is the limit and you can do and create anything. Like I said before, only your imagination will hold you back.
So get your gear out and start shooting.
I’m sure you will have questions. Share them in the comments, contact me through www.wiggersrobert.nl or the FB group. I’ll help you wherever I can.
Good luck! And show us your results in the Hacking Photography Forum Facebook Group!
Great article, Definitely got to have a go at this at some point.
Really useful post highlighting some of the tools that are available for light painting. Nice to see an article that features some really creative examples and not just spinning wool! Definitely going to check out some of the gadgets you mentioned!
I agree! Robert is really talented with this type of photography and has a lot of knowledge and skill. I’m glad you enjoyed the post Gary!
By shooting in a dark location and using photographic technique of LONG exposure photography (lets say a 30 second exposure) the flashes, streaks, colors, textures, and trails of light created by our light painting tools and modifiers can be captured in your photograph without the use of any post production. Exposure times for light paintings can range from just a few seconds up to an hour or more.
HI, you don’t speak about mobile applications witch can help us to do fun Light painting photo.
I’m a photographer and I try some technics on light painting.
I have developed an Android application witch help lightpainter to write words or paint with brush of different shapes or color.
The app is visible here;
https://play.google.com/store/apps/details?id=pat.ko.fr.lightpainting
And a page shows some samples here;
http://photifere.konieczny.fr/light-painting-tool
Sorry, this site is only available in french for the moment.
Could you give my application some visibilty on your web-site?
thanks,
with regards,
Patrick.