“What photo gear should I buy?”
I get this question quite a bit. Let me preface this buy saying what you hear a lot: it’s not the gear that makes great images.
Imagine this: we have a novice photographer and a pro photographer. We take the novices entry level camera and give it to the pro, then we take the pros camera, lighting gear, lenses, etc. to the novice. Who creates a better image? My bet is on the pro.
Creating great images is just a matter of knowledge, not gear. Give a 5-star chef a crappy knife and a single fry pan and they will create an incredible dish. Take a novice cook and give them the best commercial kitchen on the planet and their meal won’t be very good.
“So why do top photographers have a ton of the best photo gear?”
Having the right tool for the right job makes it easier to create a great shot. Just like a mechanic has the right tool for the right job.
When you first start out you won’t even know what tool you need for the job because you haven’t had enough experience. So having a bunch of the top quality expensive gear won’t help you because you wouldn’t know what to use yet! I’m telling you all this because I want to make sure you understand the best thing you can do to create great images – use what you have and take a freaking ton of photos!
Make mistakes, experiment, and enjoy the learning process. I will do my best to help show you shortcuts but don’t buy into the marketing BS you see that more megapixels makes a better image (a fry pan doesn’t make a better meal, right?)
“Okay, I got the rant. Now what photo gear should I eventually buy when the time is right”?
Okay, now that my little rant is over it’s time to dive into the gear that I enjoy. Quick note: this is not an exhaustive list, nor does it mean that every reader should have each piece of gear on this list. If you shoot different things than I do you likely will want/need different stuff than I do. I’ll cover the basics and add to this list over time for more specific purposes.
Cameras:
I always recommend that new photographers begin with an entry-level DSLR camera. Honestly, 90% of people will never need more than this. The only time you should ever upgrade your camera is because there are very specific features you need that your current camera doesn’t have. Considering the majority of DSLR camera owners leave their camera on “Auto” mode there is no reason to have extra features if the camera won’t use them.
I bought an entry-level Nikon d40 camera and loved learning on it! I only upgraded when I realized it didn’t have an internal motor necessary to auto-focus with with the 50mm f/1.8 older lens I bought. It also didn’t shoot bracketed shots and I wanted to learn HDR photography. Up until those two items it did everything I needed.
Once I reached that point I knew every single menu item in the camera, how and when to use every single button, and had reached the limit of the camera and needed more. Once you reach that point with your camera – feel free to upgrade it.
What company makes the best camera? Canon, Nikon, Sony, etc?
Quick secret: it doesn’t matter. They are all pretty much the same. I bought Nikon when I first started because a friend of mine shot Nikon and said I could borrow any of his lenses anytime. SOLD! If all your friends shoot a certain brand buy that one so you can borrow all their stuff :) Seriously thought, it doesn’t matter what brand you buy.
Best camera lenses:
The lens is WAY more important than the camera. The lens affects the quality of the image while the camera body simply records what comes through the lens. If you are on a limited budget like most people – invest in your lenses first.
The kit lens
If you are just starting your camera will likely come with a kit lens. Most of the time you can’t go wrong with an 18-55mm lens. This means it will go pretty wide to mid-range zoom. This is a great lens to learn on. The limit to these lenses besides their range (how wide or zoomed out they can get) is their limited apertures. The aperture means how big the hole in the back of the lens can get. In other words, how much light gets let in. I wrote a 2-part post on aperture, feel free to read it here. The bigger the aperture/the smaller the f-number, the more light the lens lets in. The more light the lens lets it, the more options you have to shoot in low light and the more depth of field you can get out of the lens. Most kit lenses only go to f/3.5 which isn’t great, so here is what I think everyone’s 2nd lens should be:
The nifty 50: the best and cheapest must-have lens you can get.


Do yourself a huge favor and buy a 50mm f/1.8. No matter who you are or what you shoot, you should absolutely have one of these! Here is why:They are cheap! You can buy a new Canon 50mm f/1.8 II lens for $106.51 on Amazon. You can buy a Nikon 50mm f/1.8 AF-D lens on Amazon for $132. Because the lens doesn’t zoom in and out there are fewer parts to manufacture and they are much cheaper.
Don’t shoot Nikon or Canon? There are a ton of 50mms on Amazon – click this link to see them all.
The optical quality is unmatched. Prime lenses (lenses that don’t zoom in and out) typically have much better and sharper optics. This is why so many diehard photographers don’t use zoom lenses.
They perform incredibly well in low light! Because you can open up the aperture so big (the hole in the back of the lens) more light gets through and lets you shoot great photos in near dark. This means that at the same aperture you can increase your shutter speed. Every try to shoot kids inside and they move too fast to not get a blurry photo? Yeah – this lens will make sure your photos are crisp and you can freeze those speedy kids in motion.
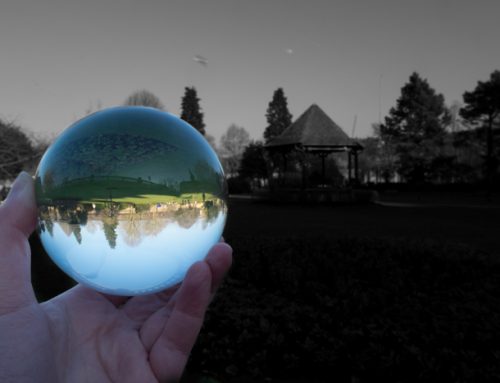
You get awesome depth of field. The bigger the aperture/smaller the f-number, the smaller the ‘slice of focus’ can be. This means that the foreground or background blurs out and looks great. One effect of this is called Bokeh. This means the beautiful circles of light that appear when small points of light are defocused in the background. Here is a quick example shot of why I love the 50mm. This room was super dark, I was shooting at 10,000 ISO, and the christmas lights in the background defocused and looked awesome.
They are so small you can carry one around in your pocket. A lot of pros always keep one on hand.
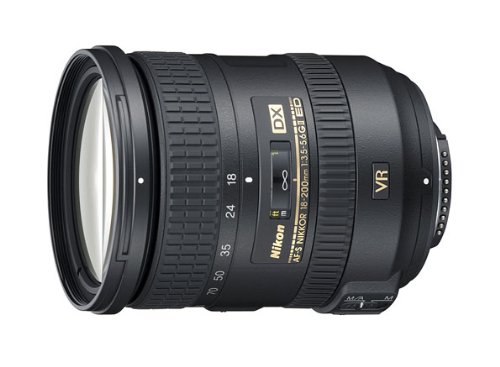
The “do-it-all” lens: the 18-200mm f/3.5-5.6 with vibration reduction/image stabilization
A TON of people ask if they are just going to buy one lens to replace their kit lens and ‘do it all’ what they should get. If you aren’t going to become a professional photographer or buy a bunch of lenses for specific different purposes the 2nd lens you should invest in (after the 50mm above) is a Nikon 18-200mm VR II lens on Amazon for $649
or a Canon 18-200mm f/3.5-5.6 IS lens on Amazon for $699.00.
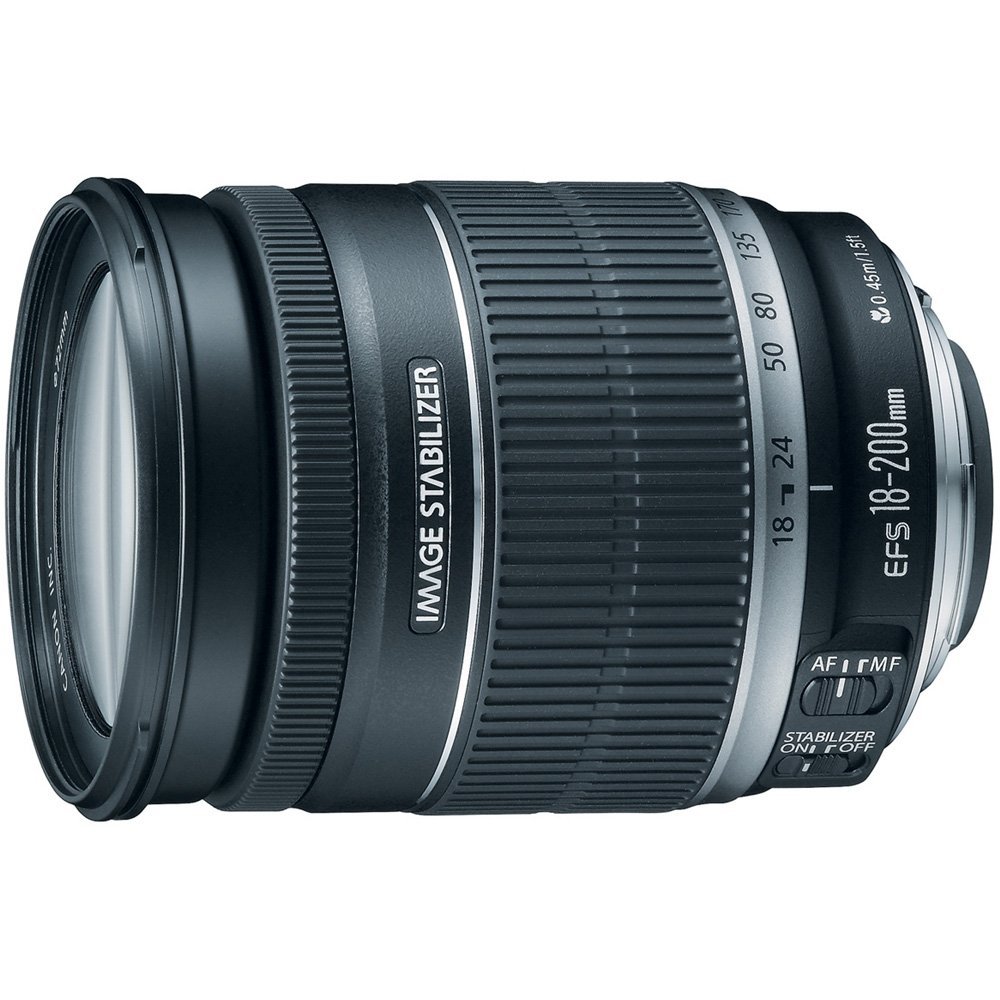
If you are only going to have one lens, buy this one. Thats right – sell your kit lens and replace it with this. Here is why:
- Big range: starting at 18mm means the lens goes really wide for landscapes and wide angle shots. Being able to zoom all the way out to 200mm means you can get those telephoto shots from super far away in the same lens. I’ve seen people who have the 18-55mm kit lens, then buy a 55-200mm lens for zooming far out. This sucks because you have to swap out lenses to zoom out. Who wants to carry an extra lens with you all the time when you could buy just one lens that has the whole range?
- VR (vibration reduction) and IS (image stabilization). This is huge. At a max aperture/f-number of f/3.5, these are not big-aperture lenses. This means they don’t let a ton of light in. In a low light situation you will have a longer shutter speed than a lens with a bigger aperture/smaller f-number. To compensate for that the genius engineers at Nikon and Canon created what equates to a shake proof lens. You can switch on (and then leave on permanently) vibration reduction (Nikons term referred to moving forward as VR) or image stabilization (canons term referred to moving forward as IS) which helps steady the lens even when you are moving. So if you have a longer shutter speed normally your hands and body would shake creating a blurry photo. This special ton the lens turns on an ‘anti-shake’ stabilization that helps you get clean shots even at longer shutter speeds. This is truly incredible an enables shooters to take clean shots handheld up to 1 second long. This means you can also scrap your tripod as you don’t need it anymore!
- This is an amazing lens for vacations! Why the hell would you cart along 3-4 lenses of varying ranges when you can just keep this one on the camera for everything! I recommended this to a good friend who went on an African safari for his honeymoon and wanted to take wide landscapes but be able to zoom way into wildlife without getting close himself. He bought it and thanked me profusely when he returned from his trip with incredible photos!
Speedlights/Flashes
The most impactful thing that will improve your photography is the light being used in the image. The light illuminates your subject/scene first, then the quality of the lens captures the light, then the camera body records the light passing through the lens. When I was first starting out a professional photographer friend who had been shooting for BBC since the 60s recommended buying an external flash.
On-camera flash is freaking terrible which is why the best cameras don’t have built-in on-camera flashes. Being able to control the light in your image is paramount to creating great photos. The best camera and lens in the world in crappy light can’t compare to the crappiest camera and lens in great light. Even an iPhone images looks amazing if the light is right. That said, if the light sucks you need to bring your own (via external flash).
Canon 480EX III
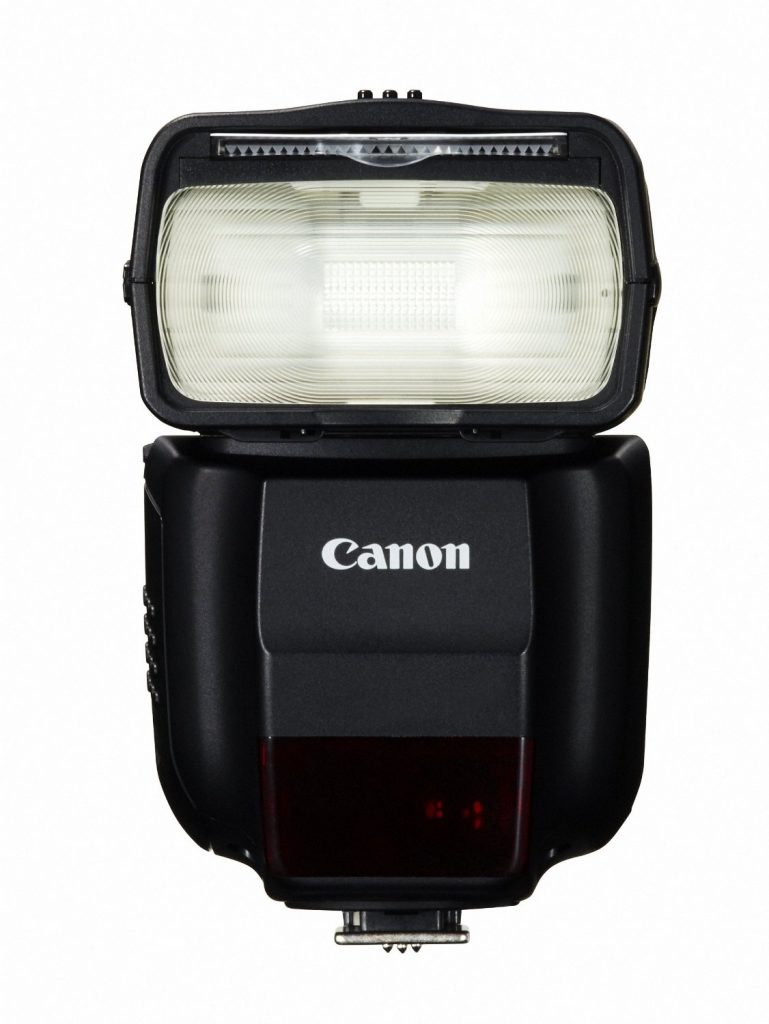
The Canon 480 EXIII is a great external flash to learn with if you shoot Canon. You can get one for $299.00 on Amazon. The flash head twists around 270 degrees so you can bounce the light off of walls and rotates upward so you can bounce light off the ceiling too. I’ll write a tutorial about this soon and update this post with a link to it.
Nikon SB-700

The Nikon Sb-700 is a great external speedlight to get started with and comparable with the Canon 480EXII above in features. Just pop it on top of your camera, turn it on, and start getting some excellent light. You can get a Nikon SB-700 on Amazon for $326.95.
Don’t mind an ‘off-brand’ flash and want to save some money?
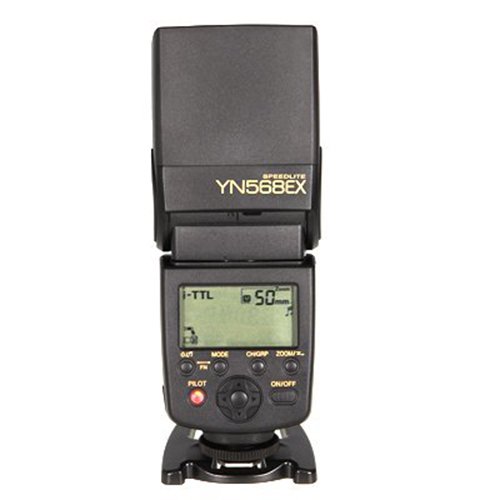
I haven’t used one myself but have many friends who swear by Yongnuo flashes. This particular model above comes with TTL for Nikon and Canon built in and its only $101 on Amazon! Don’t shoot Nikon or Canon? Check out all the Yongnuo models here.
Diffusers for flash/speedlights
The flashes above work really well by themselves, especially if you have a wall to bounce the light off of. The problem is that flashes by themselves put out hard, direct light.
Most portraits look best when the light is softened up a bit. For this most flashes come with a little soap-bar-looking thing that fits on the top of the flash. This softens up the light spreads it out.
If you want to spend some extra cash, pick up a Gary Fong Collapsible Light Sphere on Amazon for $69.95. It’s expensive, yes, but if I’m shooting people on the move at an event or party I never leave home without mine. It’s flexible enough to fit on just about any external flash and it’s incredibly light weight.
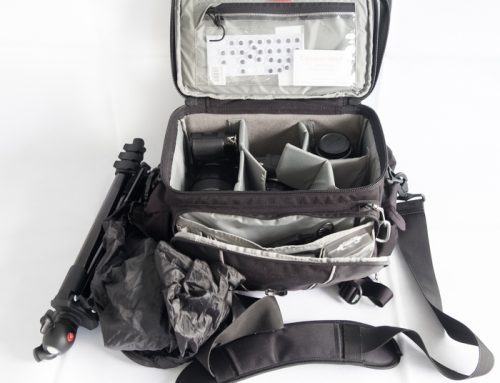
Accessories that make a difference
I’m not a fan of buying things just to buy them, but if they make a difference and improve my shooting I’ll buy them. I’m going to recommend a few things that have been helpful (but not neccessary) in creating great images.
C-Loop and Split Strap Combo
I used to carry my camera around with the factory strap. Over time my lenses got bigger and heavier, I added an external flash which added weight, and a bigger camera body. All these things added up to a pretty heavy rig that I would carry around all day.
I ended up seeing a Kickstarter campaign for the C-Loop and the split strap from a company called Custom SLR. It was started by 3 photographers in San Francisco to make awesome products. I always hated that when carrying my camera around my neck that it bounced off my chest, or when I bent over to tie my shoe it would come dangerously close to smacking the ground. Add the difficulty in navigating through a crowd with a camera and lens sticking out straight in front of you and you have a recipe for disaster!
C-Loop:
The C-Loop has changed the way I carry create images. I quite literally never leave home without it. The C-Loop is a little metal piece that you twist into the screw mount on the bottom of your camera and attach to your strap. This means the camera can twist around 360 degrees and stay by your side. Now instead of your camera bouncing on your chest as you walk through a crowd, it comfortably hangs by your side, lens facing backward.
This is a must-have for any photographer carrying a camera of any type, and you must use it with the Split Strap made by the same company.
Split Strap
The split strap attaches to the C-Loop and makes your camera feel like it’s light as air. Because it’s really wide, stretchy, soft, and has a wide cut through it, it helps spread out the weight of your camera perfectly across your shoulder. At times my camera, lens, and flash weigh 13 lbs but with this strap I can shoot 8 hours without it hurting my shoulder!
The strap sits across your chest diagonally and enables you to just pull up the camera smoothly. I’ve literally let my camera and flash hang by my side from California to Italy and trust it completely to not fall. Seriously unbelievable; I’m about to buy another one to use with my laptop bag to make it feel super light. In case you missed it above, I recommend buying a C-Loop/Split Strap combo together on Amazon for $64.95
Photo editing tools
If/when you get to the point where you start wanting to enhance your photography by learning how to edit photos, all the tools below are the ones you will want. Again, the editing doesn’t make the image, it can merely enhance what you’ve captured with good light and a good lens.
Adobe Lightroom
If you are just starting out photo editing you will want to use Lightroom before you use Photoshop. One isn’t better than the other, they just do different thing. Lightroom is based on a series of sliders. You can simply take your image and move these sliders left to right to dial in what you want your photo to look like.
Once you create a create a certain “look” that you like, you can save that series of slider positions as a ‘preset’. The next time you want to use that look, you simply click one button to apply that same ‘preset’ to your images. Almost like instagram filters but with infinitely more possibilities. The beautiful part is that you can go download and endless amount of presets from across the web and add them to Lightroom.
If you want Lightroom 6 (the most up to date version) by itself you can buy a copy of Lightroom 6 on Amazon for $143. I wouldn’t do this – there is a cheaper option. Keep reading.
Adobe Photoshop:
Photoshop is so endlessly complex you will never learn all of it. Don’t misunderstand me, it’s incredibly useful, but for most people they will only need Lightroom. If I am going to change a photos overall feeling, mood, etc I will use Lightroom.
The only time I take a photo into Photoshop is when I’m doing “surgery” on an image. I say “surgery” because I only use Photoshop to do very meticulous editing work. Cleaning up blemishes on the skin, removing specific parts of an image, removing wrinkles from skin, removing bags from under eyes, etc.
If you want to do this type of editing in your photos than you have no choice but to invest in photoshop. I often use both. I import photos into Lightroom to create the mood, bounce them over to Photoshop to do the detail work, the bounce them right back into Lightroom to export them.
You can buy Photoshop CS6 on Amazon for $640 for PC, or $699.99 for Mac on Amazon. I wouldn’t do this – there is a cheaper option. Keep reading.
The Adobe Creative Cloud: subscription-based software
Up until recently Adobe released a new version of Lightroom and Photoshop almost every year that you bought or upgraded. Recently they have changed their business model to move to a SAAS service (software as a service). This means instead of buying a new version every year of each program you can now just pay a monthly subscription fee for both programs use (like Netflix). The fee for the Creative Cloud Photography program which includes BOTH Lightroom and Photoshop is only $9.99/month.
The upside is that Adobe can now roll out enhancements to each product in real-time vs. waiting for a once-a-year release. This is awesome because new tools come out way faster and the product gets much better quicker.
The downside is that you must keep paying this monthly fee to keep using the software. If you stop paying, the software won’t work. You can currently buy Lightroom 5 and Photoshop CS6 separately without the monthly fee.
Cost Breakdown for each option Moving forward Adobe will no longer enhance those two products. So once CS6 and Lightroom 5 are done everyone will have to move to subscription pricing or not use either product. So eventually the new updates to the subscription versions will be so far ahead you might eventually have to move to that process.
Lets look at the dollars and sense.
- Cost to purchase Adobe CS6 and Lightroom 5 for PC: $747.91
- Cost to purchase Adobe CS6 and Lightroom 5 for Mac: $757.91
- Cost to purchase Adobe Creative Cloud for Mac or PC: $9.99/month currently, they may raise this to $19.99/month in the future.
At $9.99/month currently for Creative Cloud you would pay for over 6 years before you’ve paid the same as buying the previous boxed software.
I will use all the new tools as they come out, and it’s easier for me to justify spending the price of 2 Starbucks coffees per month on software I will love and use all the time than spend $750 upfront. I already had Photoshop and Lightroom and would upgrade every year to get the new features. Adobe used to cut previous users a deal to upgrade each program each year. Let’s look at those costs:
- Lightroom 5 upgrade for previous users: $74.99 on Amazon
- Photoshop CS 6 upgrade for previous users: $196.19 (this will not last long – Adobe has stopped selling upgrades for CS6)
Total upgrade price to outright buy each software: $271.18/year to keep up to date (plus the roughly $750 upfront to buy it in the first place)
Get the New Adobe Photoshop Photography Program for only $9.99/month. Limited Time Offer!![]()
Current price to subscribe to Creative Cloud: $119.88/year with no upfront money, just $9.99/month.
Best Option if you ask me? Join the Creative Cloud at $9.99/month.
You can sign up here which gets you BOTH Lightroom and Photoshop for $9.99/month.
Wacom pen and tablet for editing

Let me preface this buy saying you won’t need this until you do a good amount of photo editing, specifically in Photoshop. When you are in photoshop you are doing very meticulous detail work that just sucks with a mouse. Imagine trying to ‘paint’ a smooth curved line across the wrinkle someones forehead, like you would paint a curved brush stroke. This is difficult with a mouse. T
he Wacom tablet and pen operate like a mouse but in a pen form you use just like a pen. The tablet is pressure sensitive so if you hold the pen and press down harder on the tablet the brush stroke will be fatter. Press lighter and the brush stroke will be thinner.
It took me a few years to realize I needed one of these, but once I bought it I realized I could never live without it. Again, if you only use Lightroom and don’t edit in Photoshop don’t buy one of these. If you are at the point where you want to speed up your work process in Photoshop do yourself a huge favor and buy one of these. I promise you it will take you a day or two to get used to it but once you do you will thank me for the time it will save you and how much more enjoyable it makes photo editing.
 There are many different models but if you are just starting out this Medium Intuous tablet and pen on Amazon for $185.99 will be perfect for you. If you are on a budget they also make a small sized Intuous tablet on Amazon for only $89.00. I personally like the medium size as I edit on a 27″ monitor when the image is zoomed in pretty far so the distance of my editing strokes require me to have a longer tablet. If you are editing on a smaller screen you won’t need as long of a tablet so the small size could work just as well for you.
If you hate wires on your desk as much as I do you can also purchase their wireless kit for $39.99 on Amazon which works on both of them. The only pain in the ass part of this wireless kit is that it will take up an additional USB port on your computer when you want to use it.

Excellent article, but I disagree with the Adobe cloud service. Most photographers don’t upgrade their software yearly as there’s seldom a need to do so. This is precisely why Adobe moved to an onlin-only service; to ensure we keep paying them. As Adobe software continued to get better, very few people upgraded within 3 years. I have CS6 and I’ll say on it until it no longer works.
Hi @TerminatahX:disqus (I love that name by the way). Thanks for writing. I can definitely see where you are coming from. I might be a little biased as I’m a full-time photographer and even a single release like Content-Aware Fill can save me hundreds of hours of editing time throughout the year, which makes the enhancements worthwhile from me.
I’d prefer not to have to pay monthly but I also want to support Adobe considering they make an amazing product I wouldn’t be able to operate my business with. They also suffer more piracy than almost any company I can think of. I’m guessing this monthly pay model is their best way to try and combat that which I can understand.
Anyway, I have a good amount of friends that are going the route of CS6 and LR 5 and owning them outright for as long as they can!
I’m a relative beginner in having a Canon DSLR for 4 years and poor eyesight so I can’t exactly take professional looking images hand-held, but I reinforce your suggestion that if you buy no other lens, the 18-200mm 3.5-5.6mm lens is the ultimate ‘Must Have’. Of course I have to use the lens on AF (autofocus), but that doesn’t matter.
I have 3 other lenses and I use my 18-200mm 95% of the time. It’s absolutely perfect for close-ups and for zooming in to shoot ‘birds in a tree’ and ‘street photography’, I’m still not game to get close to do street photography with my 50mm 1.4 and mainly use it for flower shots.
Loved reading your take on things! Thx for sharing.
Thanks Melanie, I’m glad you enjoyed it!
You should know all about how to get the right white balance by now; using a grey card is the best way to get the most accurate results. Carry these around in your camera bag for whenever you feel the camera is getting it wrong. They re easy to use and have a great affect on your photos.
Great tip! Thank you for sharing – I should really get around to writing a post just on how to effectively use a grey card as well as colorchecker passport for correct colors as well. Thanks for leaving a comment!
Great info really helped me out when i was stuck looking for a lens and did no how i was going to afford paying 2 grand for a lens on a $600 camera.
Thank Nick, I’m glad it helped you save some cash!
I recently purchased a Lighting Light Video Photo Softbox Umbrella Photography Kit Backdrop Muslin.
I have since started shooting on my spare time at home and quite frankly, am making a substantial amount of money on the side apart from my regular 9 – 5. :)
This has been one of the best investments I’ve made recently!
I hope this helps others when making their next purchasing decision.
Have a great day!
Sincerely,
Anthony E
This was so very helpful! Thanks so much.
hello mike. i just read your article and its really of help to me as a beginner. i am not yet professionally into photography for some financial reasons. i just have a small sony digital camera with a 20.1 pixel and i just take photos of people in natural environments. i also do not have a graphic knowledge say Photoshop or light room. can i use my camera to do some professional studio shots..
however i would appreciate your mentorship in my career and also in photo editing. pls reply me thanks.
Hi Richard, I’m glad to have you here! You’ll find a lot of tips and tricks here on the blog to help you along your journey as you continue learning.